Last Updated on May 22, 2022 by WP Knowledge Hub
Popups, or as they are sometimes called, modals, are a popular way to get a user’s immediate attention. They are used mainly to advertise an important idea, event, or to promote something, like a newsletter or a temporary deal. Instead of hiding this news in a blog post that may be missed by most users, a popup forces them to interact with the site (even if it’s just to close it), and take note of what requires their immediate attention.
If done subtly, it can be a very successful tool. If not, it can be very frustrating and annoy users into leaving your site and not coming back.
Most successful WordPress blogs and websites like to use popups to encourage users to sign-up or subscribe to their newsletter. If your website has a lot of organic traffic, doing this can significantly increase your base, and revenue.
In this article, we’ll show you how to setup a popup using the popular plugin, Popup Builder, and also how to customize it to show a Mailchimp embedded form. We’ll also go into more detail about what Mailchimp is, and why you would want to use it.
But first… should you use popups?
Are Popups Effective?
A lot of people imagine popups to be annoying ads from unreliable sources or as click-baits to install unwanted bloat-ware on their computers.
But perception and reality can sometimes be two totally different things.
- If you look at all the big brands today, almost every one of them uses popups to increase conversions, because they work!
- Good popup plugins allow their users to create SEO-friendly popups that can be optimized for a better experience.
- Popups can increase your email list by converting, on average, up to 3% of your users into clients. According to Sumo.com, the top 10% of marketers in the world have a 4.77% conversion rate!

Even if you’re not part of the 10% best marketers in the world, you can still safely capture tons of email addresses by adding a subscribe form in a well-optimized popup.
How To Create Popups in WordPress
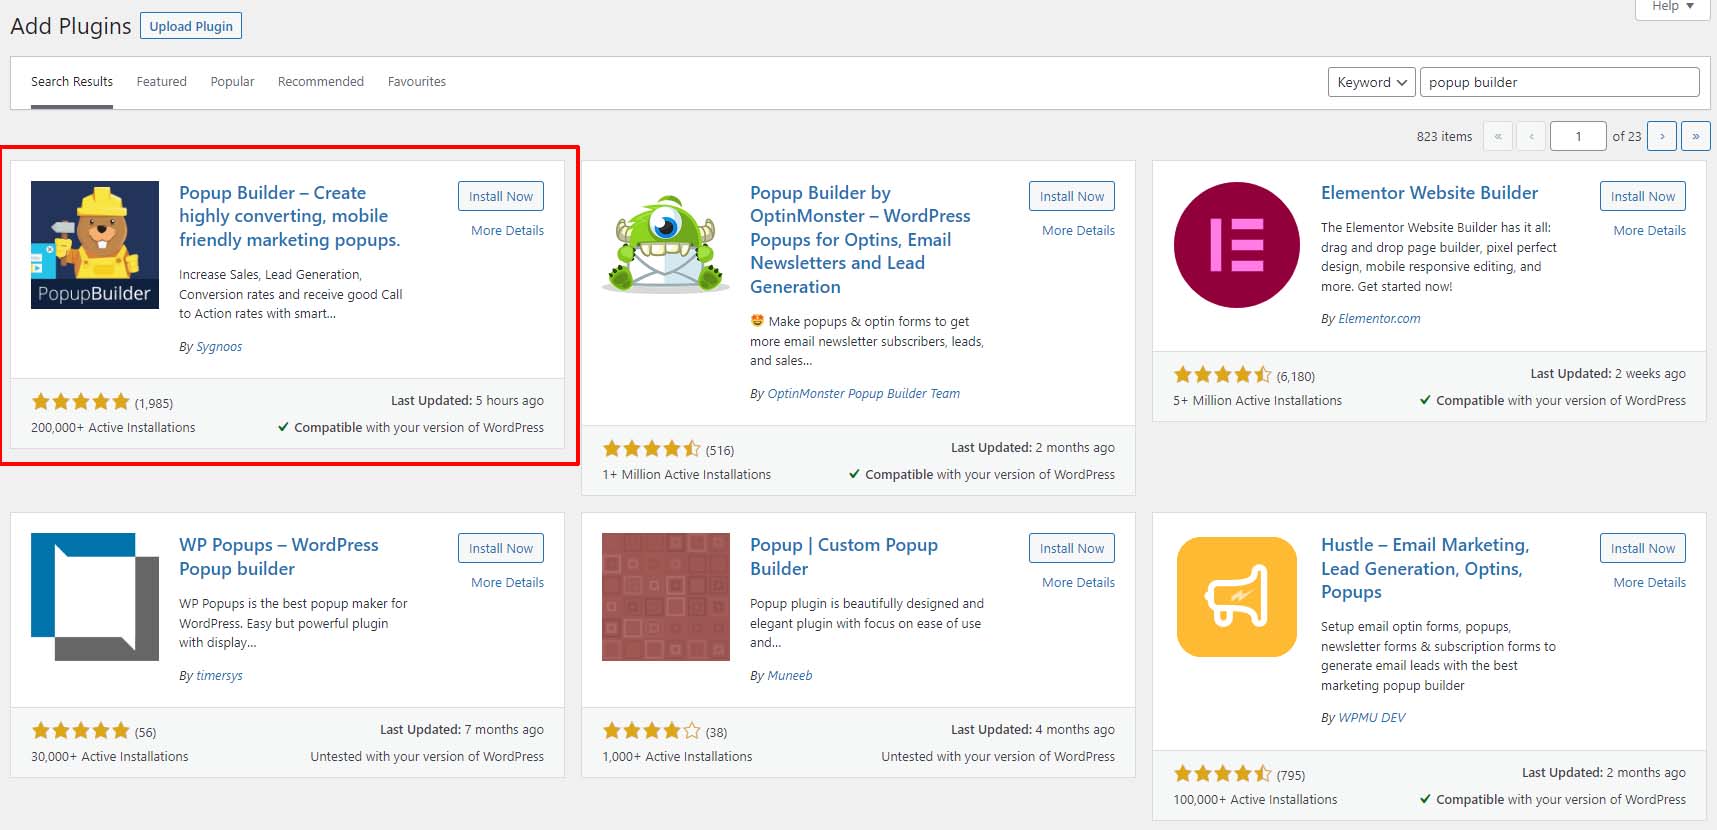
To create your first popup, you’ll want to install the Popup Builder plugin.
From your WordPress dashboard, go to Plugins > Add New > and search for Popup Builder. Install the one that looks like this:
In your dashboard, you’ll notice a new tab called Popup Builder. Select that, and click Add New under the Popups title.
You will now be asked what kind of popup you want to create. There’s four kinds available with the FREE version:
- Image Popup – if you have a pre-made image of a product or a sale that you want to advertise, that doesn’t require sign-ups.
- HTML Popup – if you want to add your own code in the popup box, like a Mailchimp form, for example.
- Facebook Popup – to advertise your Facebook page
- Subscription Popup – to use Popup Builder’s built-in Newsletter subscription service (Mailchimp is so much better)
Note: you’ll notice the premium add-ons have a Mailchimp popup available, but we can set it up for free anyways!
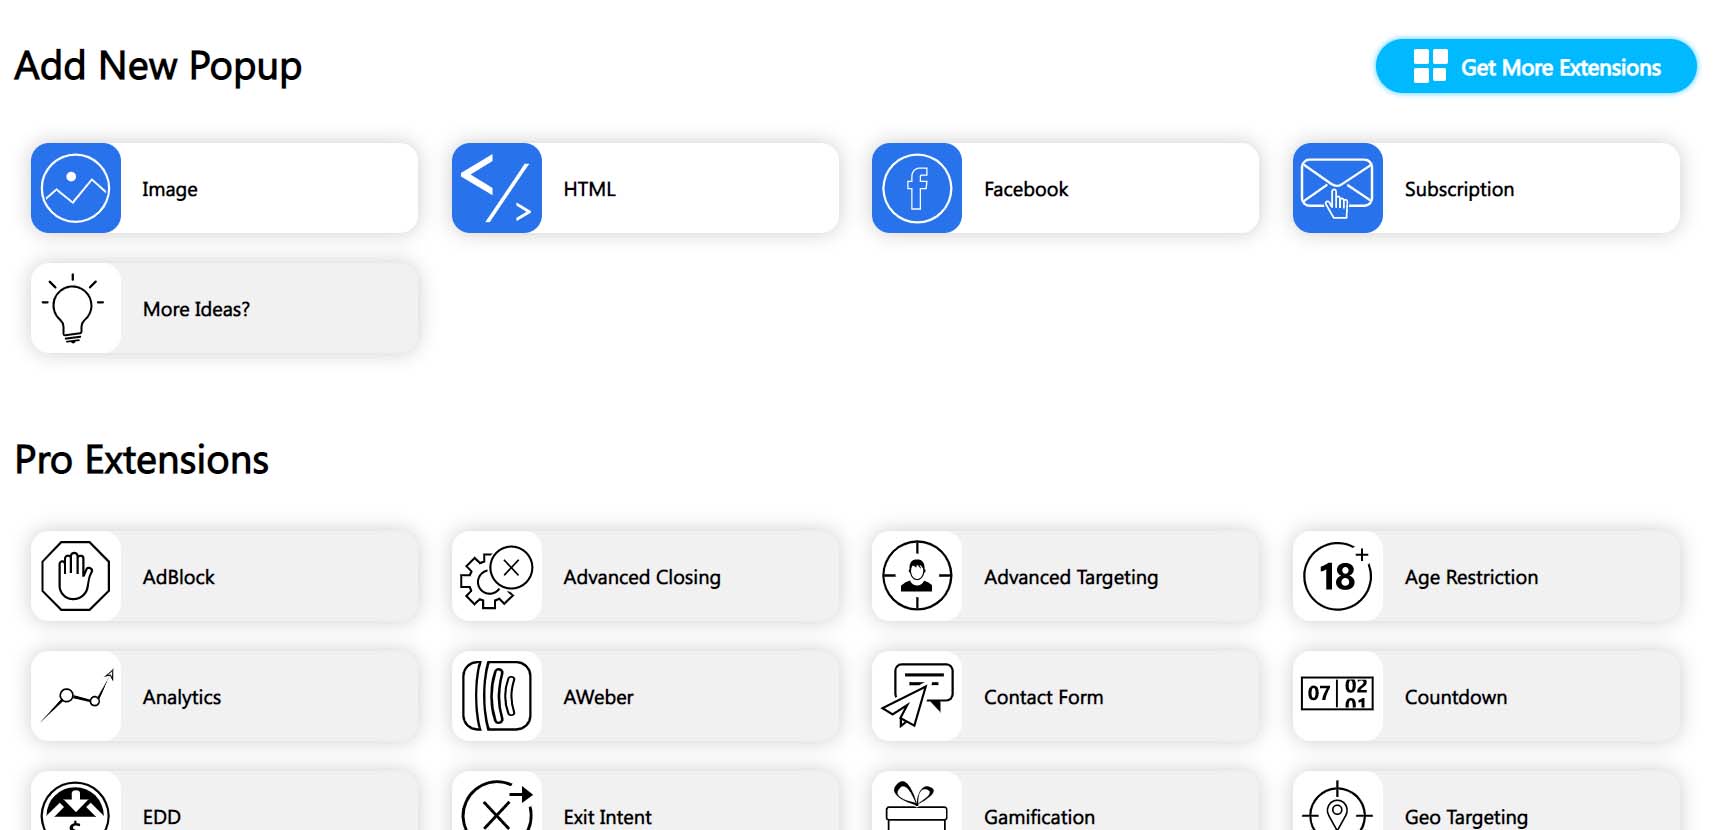
Let’s go ahead and choose the HTML popup.
Popup Builder Settings in WordPress
We can give it a title of “Mailchimp Popup” of “Newsletter Popup” or any other name that fits what we want to do.
You’ll also need to input the Mailchimp form in the editor here when we have it, but we’ll skip this part for now and come back to it later.
Display Rules
Now scroll down passed the editor, and you’ll notice the Main Options box. The first thing we need to do is set the display rules. The display rules allow us to tell the popup where we want it to appear. If you open the dropdown box, you’ll see the options:
- Everywhere
- Posts
- Pages
- Tags
‘Everywhere’ will display on every page, post and archive, unless you set a Showing Limitation in the Advanced options (more on that later).
Events
Next is the Events section. Here you’ll choose if you want your popup to open automatically after a certain period of time, open on click, or open on hover (there are more premium options available as well).
- On Load – choose the delay, in seconds, before the popup appears.
- On Click – Choose the custom class that will be applied to the button that opens the popup. If you want your popup to open by clicking a “Subscribe” button, you will have to add this class to it in the website code. If you use a page builder like WP Bakery or Elementor, these will have a option to add custom classes to each element.
- On Hover – same thing as On Click, but the popup will trigger when the cursor is over the element, as opposed to when it is clicked.
You can skip the Conditions and Behavior tabs, and go right to Design.
Design
Here is where you can tweak the appearance of your popup. You’ll be able to change the white space around the popup, choose a theme, change the color and opacity, and even give it a background image.
Closing
In this next section, you’ll want to make sure you have Dismiss on “esc” key: and Show “close” button: enabled, as this will improve the overall user experience.
You can skip Dimensions, and go right to Advanced.
Advanced
You want to make sure to read and examine every option here, as you will be able to change quite a bit of settings here, but the most important factor here is to set a Showing Limitation to not annoy our users. Without it, the popup will return on every page and every post, every time.
In order to avoid frustrating the user, we want to make sure they only see the popup ONCE a day, at most.
Set the Popup showing limitation to ON, and set the showing count and expiry to 1.
You can now safely Save a Draft of your new popup, while we setup Mailchimp and grab our embedded form.
How To Create A Mailchimp Popup in WordPress
Mailchimp is one of the most popular newsletter platforms in the world, because it’s so intuitive, easy-to-use and it’s free! You can have up to 2000 subscribers (at the time of writing) without paying a cent! If you’d like to give your visitors a way to subscribe to your Mailchimp list right from your site, you can create an Embedded Form and put the code in your Popup Builder popup.
Creating an Mailchimp Embedded Form for WordPress
While this tutorial won’t go into detail about how to signup for Mailchimp and configuring your account, you should be able to do that yourself very easily. The setup wizard is just as intuitive as the product, and your account should be ready to go in no time at all.
Once you’ve done that, you will be able to see your dashboard, which is very similar to WordPress’ dashboard.
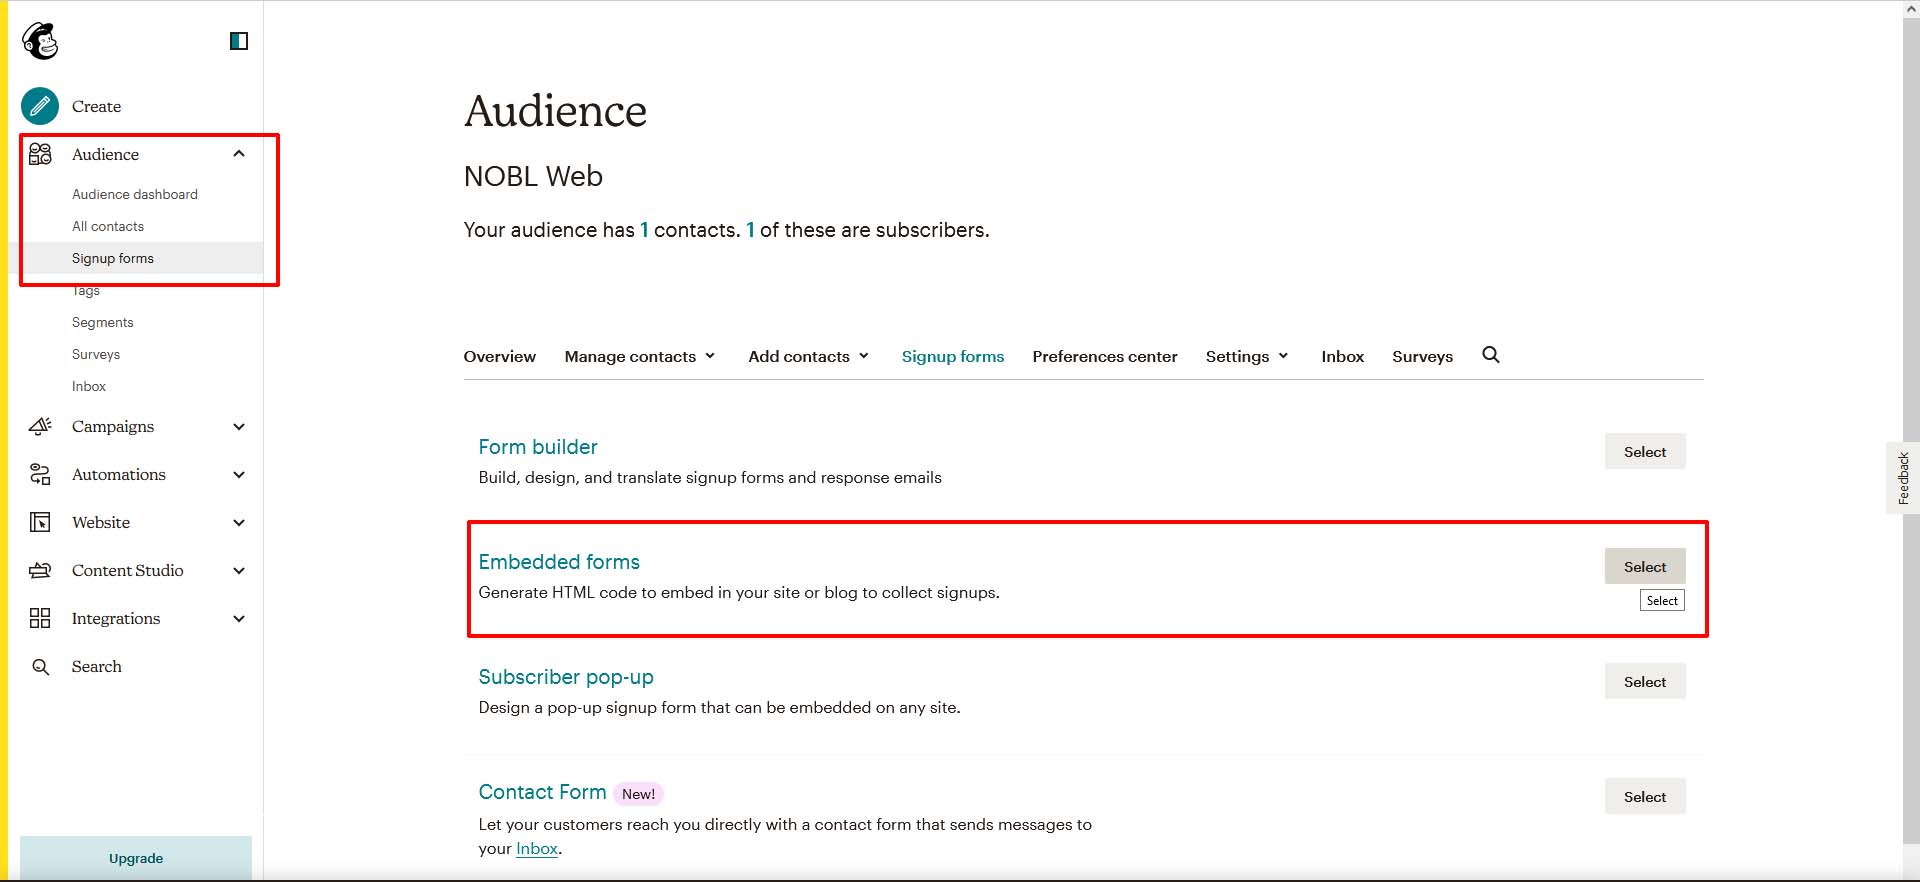
Under the Audience tab, click on Signup Forms, and select Embedded Forms:
Once you do, you can select the form fields you want to display on your sign-up form, including First Name, Last Name, and more.
Click Continue in the top right corner when you’re done this step.
Embed Code
You will be given an embed code that starts with:
<!--Begin Mailchimp Signup Form-->You’ll want to copy the entire code by clicking the “Copy Code” button in the top right on the code box.
Adding the Embed Code to Your Popup Builder Popup
Now that you’ve copied the embed code from Mailchimp, you’re ready to paste it in your popup.
Return to your WordPress dashboard, and select Popup Builder once again. You’ll see now that you have the new popup you created earlier listed here to edit. Click on it.
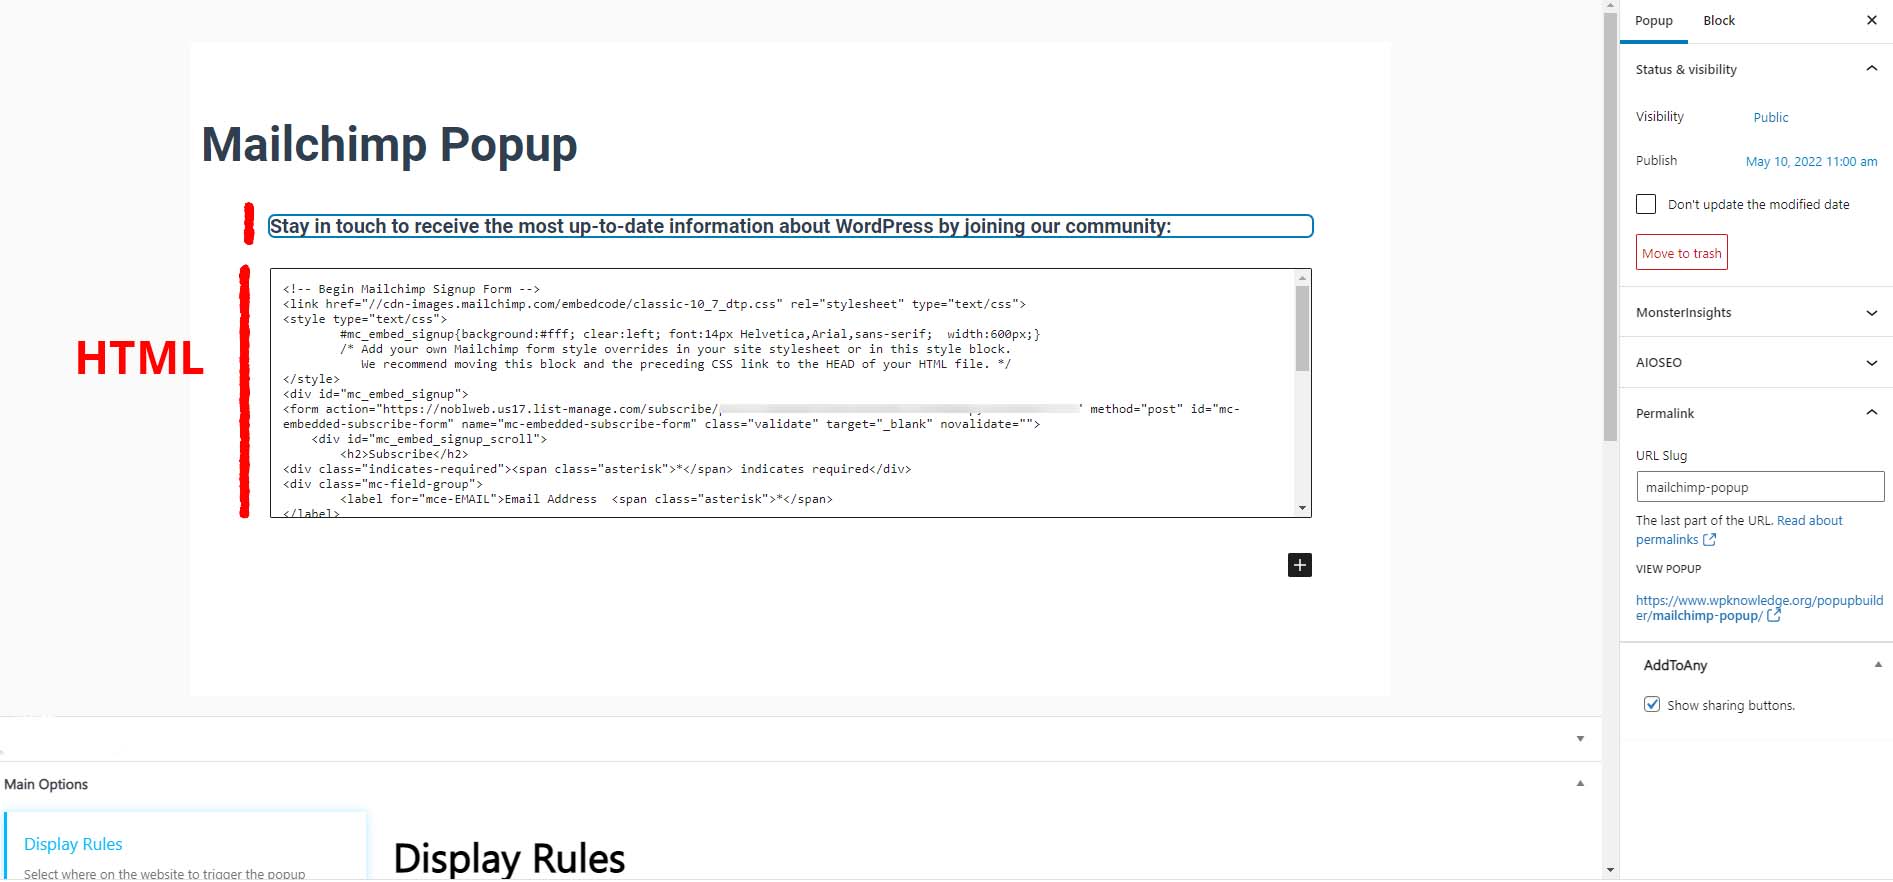
Returning to the WordPress editor once more, you’ll be able to add an introduction to entice your users to join or subscribe, as well as an HTML block with the Mailchimp embed code, that will look something like this:
Now it’s time to publish and test your new popup!
Testing the Mailchimp Popup
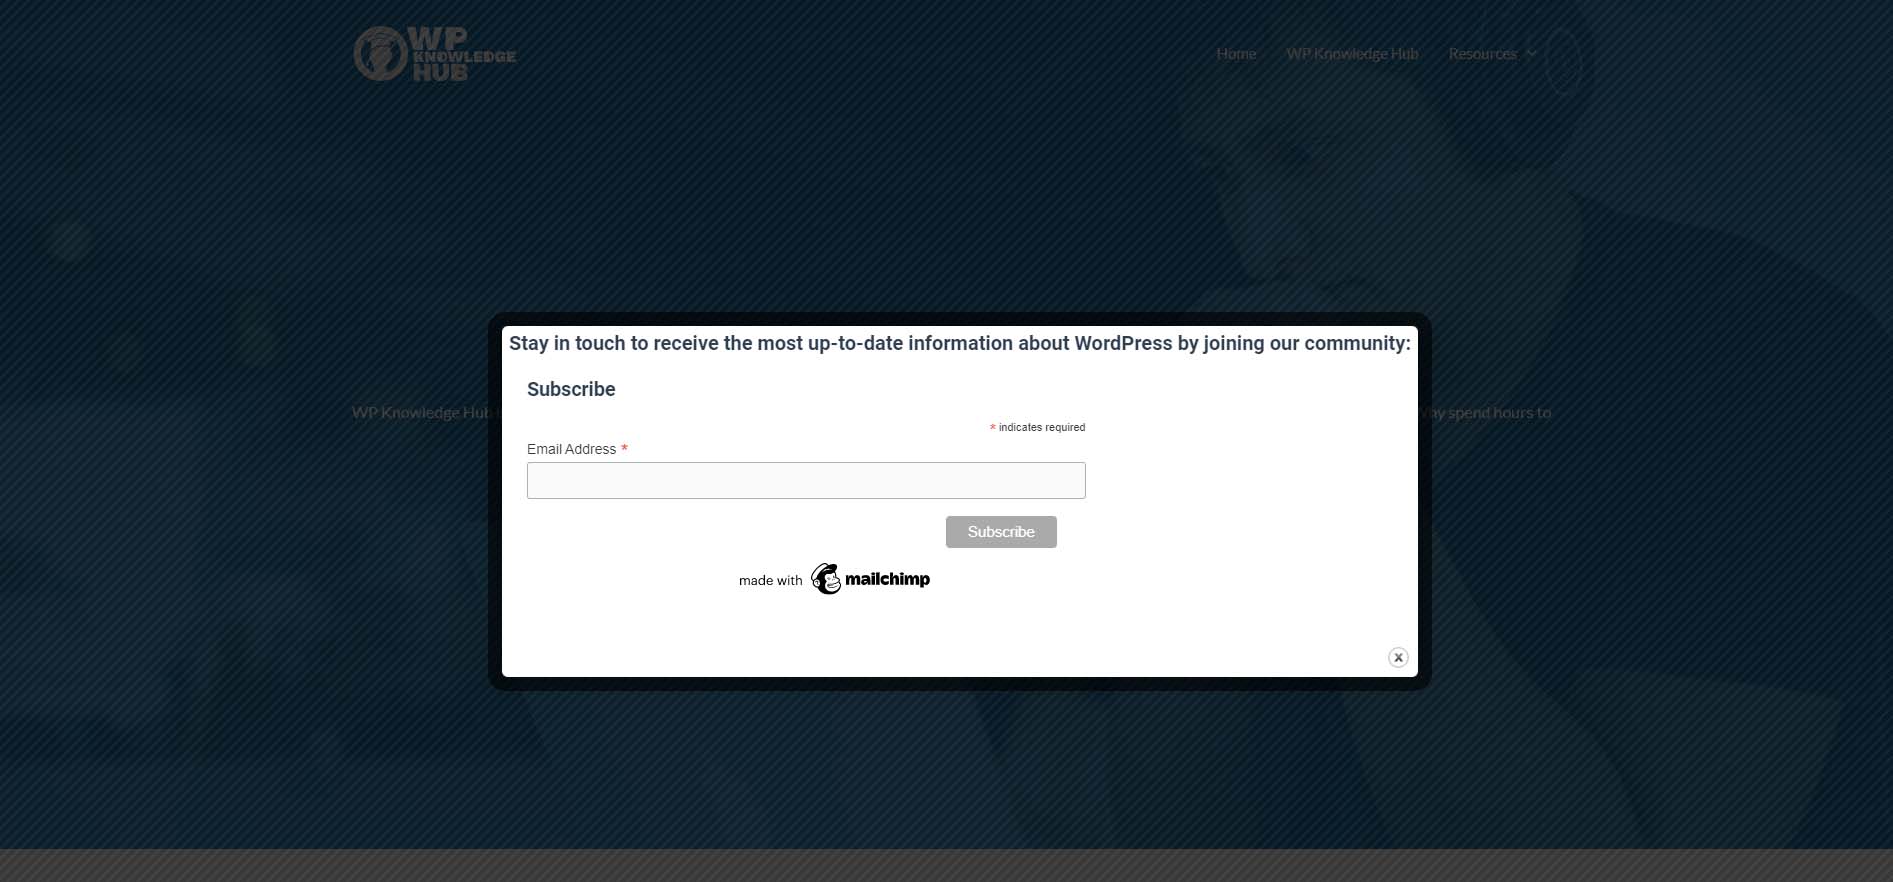
If you did everything correctly, once you reload your site for the first time after creating your popup, you should see it appearing (unless you chose the On Click or On Hover function, in which case you will need to go click on the button you set it up for).
After your popup shows up once, make sure to refresh a few times, and view some different pages to make sure it doesn’t come back. There is nothing more annoying than an errand popup, so once again, please make sure you set it to display a single time per day.
You can now use one of you email addresses to verify that Mailchimp is capturing the addresses correctly.
Fill out the form, and return to your Audience in Mailchimp to see yourself added to your contacts.
That’s it!