Last Updated on April 20, 2022 by WP Knowledge Hub
Custom Post Types let you to go beyond posts and pages and allow you to create different content types in WordPress.
Why Use Custom Post Types in WordPress?
Custom Post Types are just like posts or pages, but they basically let you add a “second” (or multiple) types of posts. It’s different than, let’s say, a category or a tag. Categories let you break down posts into different sub-divisions. For example, you could use your posts as News, and have many categories like ‘Recent News’, ‘American News’, ‘European News’, ‘Health News’, etc., but a Custom Post Type would allow you to not only keep your News structure as-is, but let you create an entire new series of stand-alone posts, like a Portfolio, for example.
In the Example above, you could also sub-divide the Porfolio posts into categories. Now you have News + categories, and Portfolio + categories, each with their own archive.
This is especially useful when you have a large site with tons of articles with many parent categories and sub-categories.
By default, WordPress comes with these post types:
- Post
- Page
- Attachment
- Revision
- Nav Menu
You can also create your own Custom Post Types and call them whatever you want:
Here are the most common use-cases for CPTs:
- News
- Portfolios
- Events
- Reviews
- Testimonials
How do I create a Custom Post Type?
Creating a Custom Post Type
The best way to create a Custom Post Type or CPT is by using the Custom Post Type UI plugin.

Go to Plugins > Add New > and install + activate the plugin in the screenshot above.
Next, go to CPT UI > Add New Post Type to create your very first Custom Post Type!
First you need to add the basic settings, like Post Type Slug, plural and singular label for your Custom Post Type. Once you’ve done that, make sure to click the Populate additional labels based on chosen labels link underneathe to auto-populate all the remaining labels based on the few you entered manually.
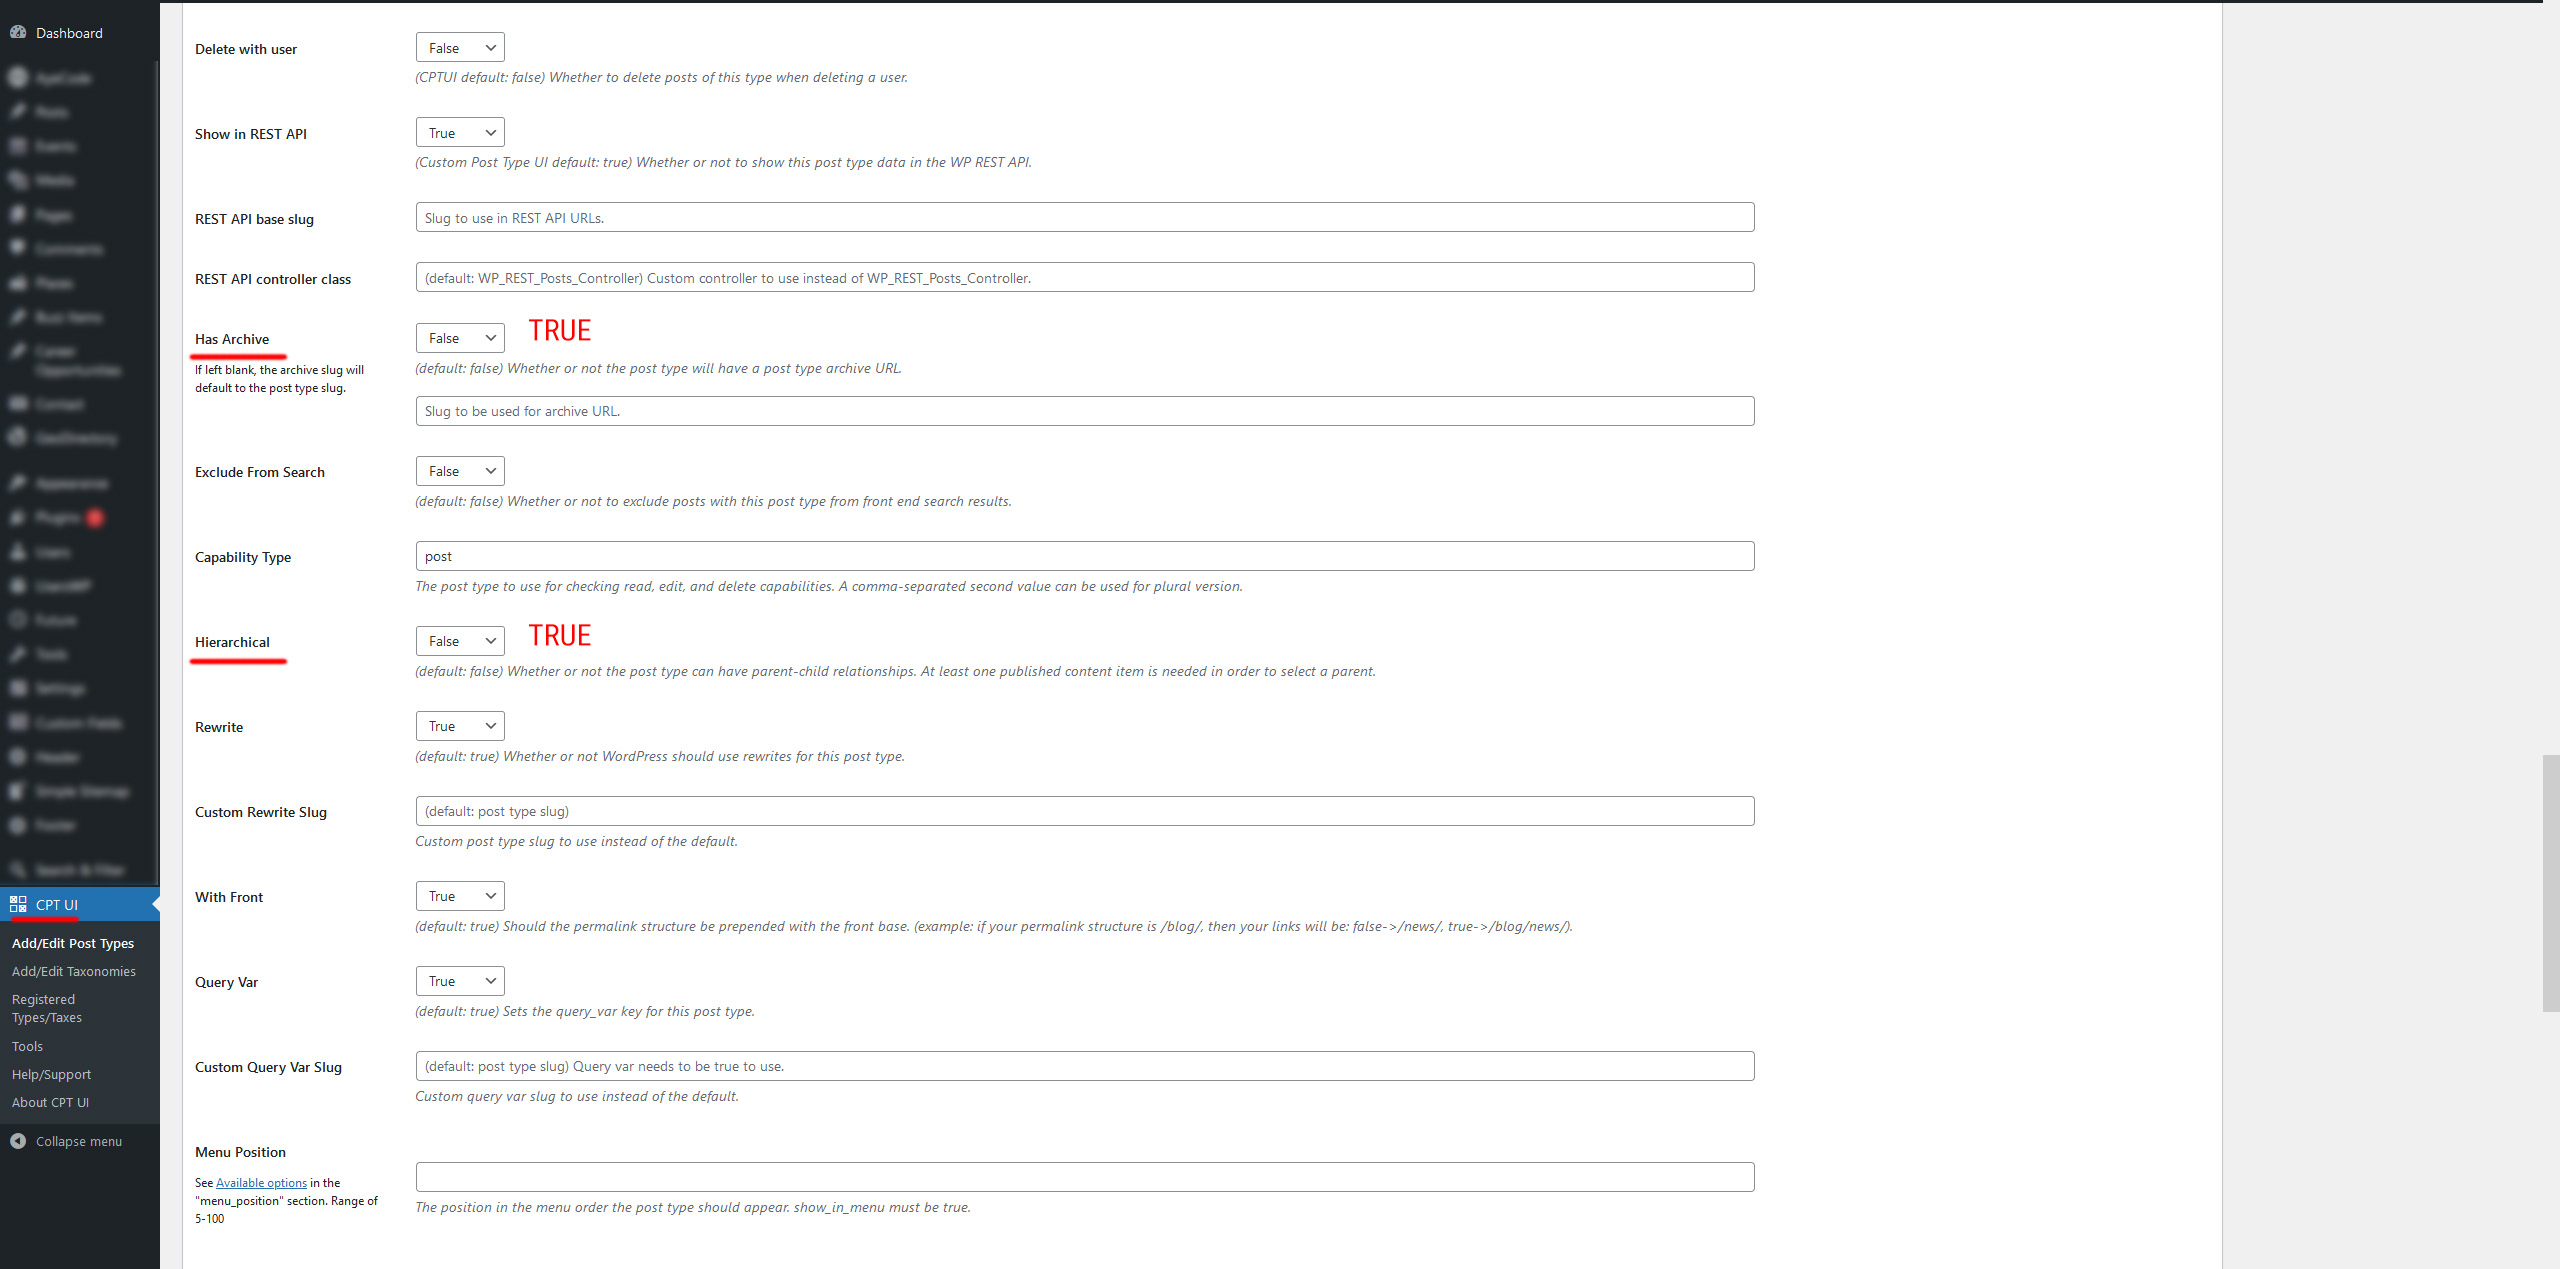
After that, you can set the Custom Post Type settings where you can see each option comes with a brief description explaining what it does. Don’t forget to set HAS ARCHIVE and HIERARCHICAL to TRUE if you want your custom post types to have categories and searchable archives.
Lastly, click on the ‘Add Post Type’ button to save and create your custom post type. You can always come back and edit these settings in the future if you’re not happy with how it works out-of-the-box.
That’s it! You have created your first custom post type! Congratulations!
How do Custom Post Types Show Up on Your WordPress website?
WordPress has built-in functionality for displaying your Custom Post Types. After creating one, you can add it to your navigation the same way you would add a page.
To start, you need to go to Appearance > Menus and add the custom link to your menu.
If your CPT was about Testimonials and you used the slug /testimonials, then you can simply go to YOURDOMAIN.COM/testimonials to view your Custom Post Type.
More advanced settings and customizations exist for Custom Post Types, but they will be the subject of a future post! Good luck!


