Last Updated on May 12, 2022 by WP Knowledge Hub
Many of our clients want to start a membership site, or rather, a client portal where special users get access to restricted content. So, which WordPress plugin should you use to create a client portal or membership website in WordPress? The Paid Memberships Pro plugin is the fastest, cheapest and most user-friendly way. This amazing free plugin has so many features and add-ons that will enable you to quickly turn your website into a powerful membership site.
The first thing you’ll want to do is go to Plugins > Add New > and search for “Paid Memberships Pro“. Install it, and activate the free version.
What Does Paid Memberships Pro Do?
Paid Memberships Pro sets your WordPress website up to start, manage, and build your client portal. This plugin was made for allowing restricted content, selling online courses or training, clubs, organizations, businesses with sensitive documents, discount/deal websites, subscription products, and more!
You can create multiple membership levels and users can select which one they want, complete the checkout (or sign-up for free if you allow it), and become a member of your site. Depending on which membership level they paid for, they can have access to different types of content.
These are the important features of this free plugin:
- It’s free
- Lots of popular payment gateways including PayPal, and Stripe
- Unlimited membership levels
- Flexible pricing options
- Extensive settings
- Member dashboards
- Reports
Although Paid Memberships Pro offers premium plans, we’ll use the free version for now.
How to Create a WordPress Client Portal with Paid Memberships Pro
The first thing you’ll see after activating the free plugin is the Paid Memberships Pro Dashboard:
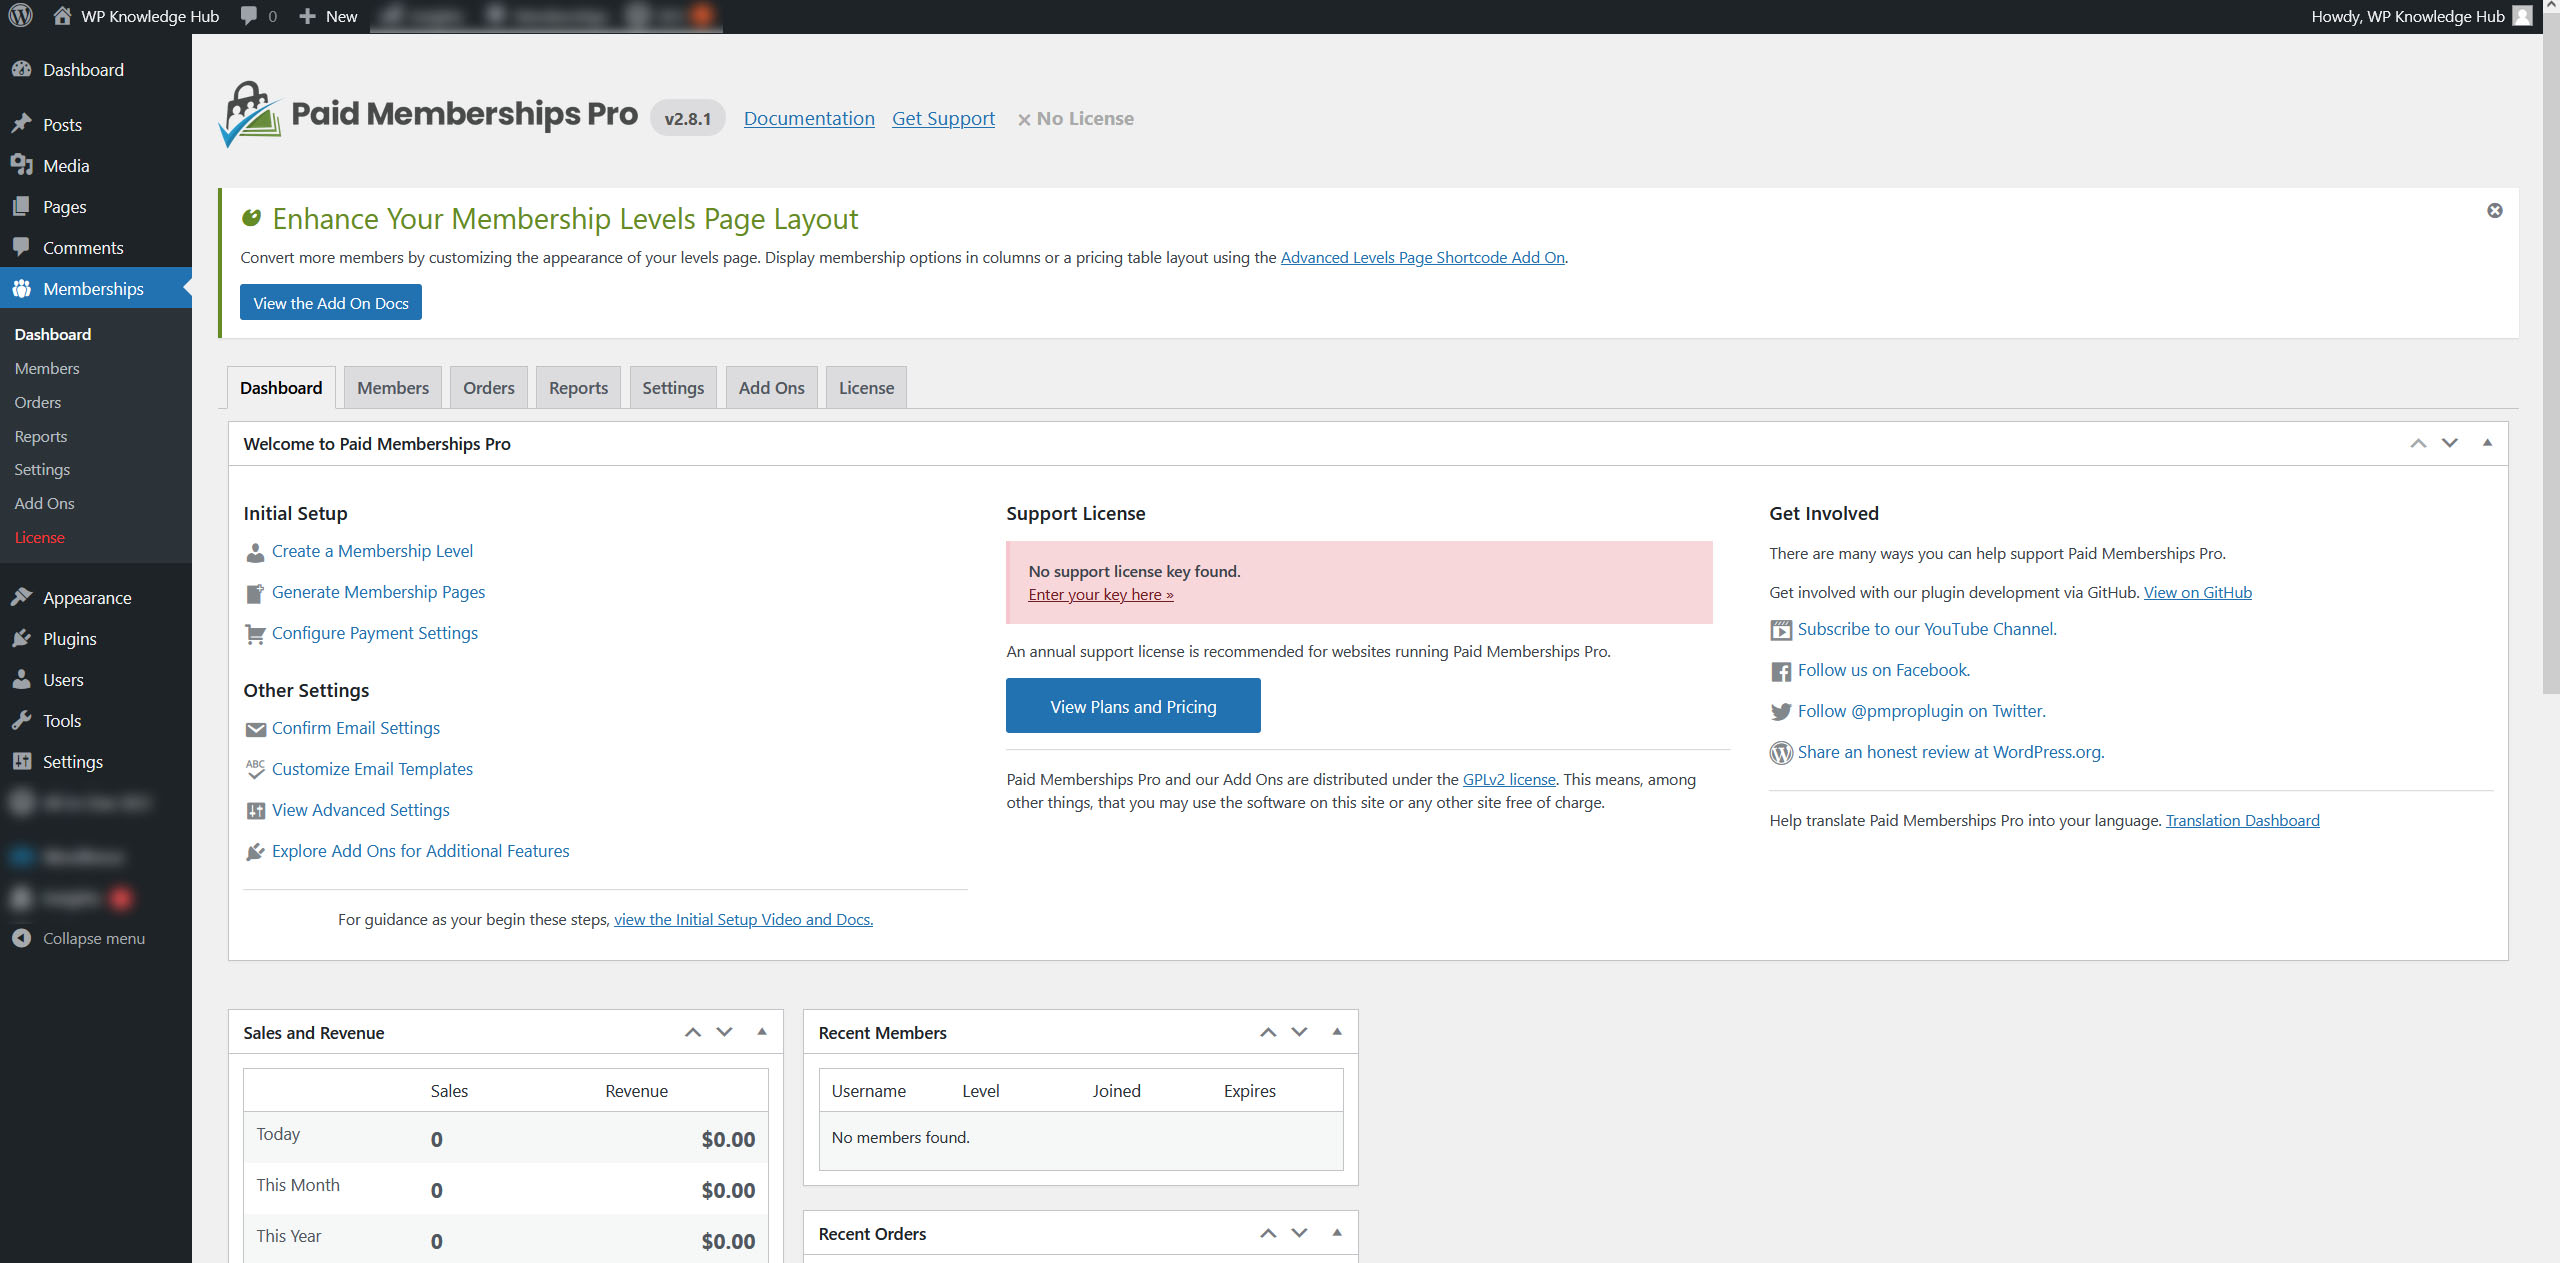
You’ll also notice you now have a new tab in the WordPress dashboard sidebar called Memberships. You can always return to your dashboard by clicking here.
The first step in the initial setup is “Create a Membership Level“. This allows you to create a hierarchy of memberships, for example, BRONZE, SILVER, GOLD, PLATINUM, etc., where each level would have more and more important content. You don’t need multiple levels if you only want to restrict one page, but you need at least one level to get started.
Create a Membership Level
The Add a New Membership Level page will ask you for a Name, Description, Confirmation Message (to the successful subscribers), and Billing Details, such as how much it costs, and how often it should re-occur, if at all.

When you’ve entered all the information for this membership level, click SAVE.
Generate Membership Pages
Next you’ll want to ‘Generate Membership Pages‘. From the dashboard, select Generate Membership Pages, and click Generate Pages for Me. Membership Pages are the pages your website will need to allow Paid Memberships Pro to function. The generated pages include:
- Account Page
- Billing Information Page
- Cancel Page
- Checkout Page
- Confirmation Page
- Invoice Page
- Levels Page
- Log In Page
- Member Profile Edit Page
Each page will have the appropriate shortcode created on its respective page. Shortcodes are pre-coded strings inside square brackets that allow a specific plugin function to execute.
After clicking the button, Paid Memberships Pro will generate all the necessary membership pages you will need.
Configure Payment Settings
From the Paid Memberships Pro dashboard, click Configure Payment Settings, under Initial Setup.
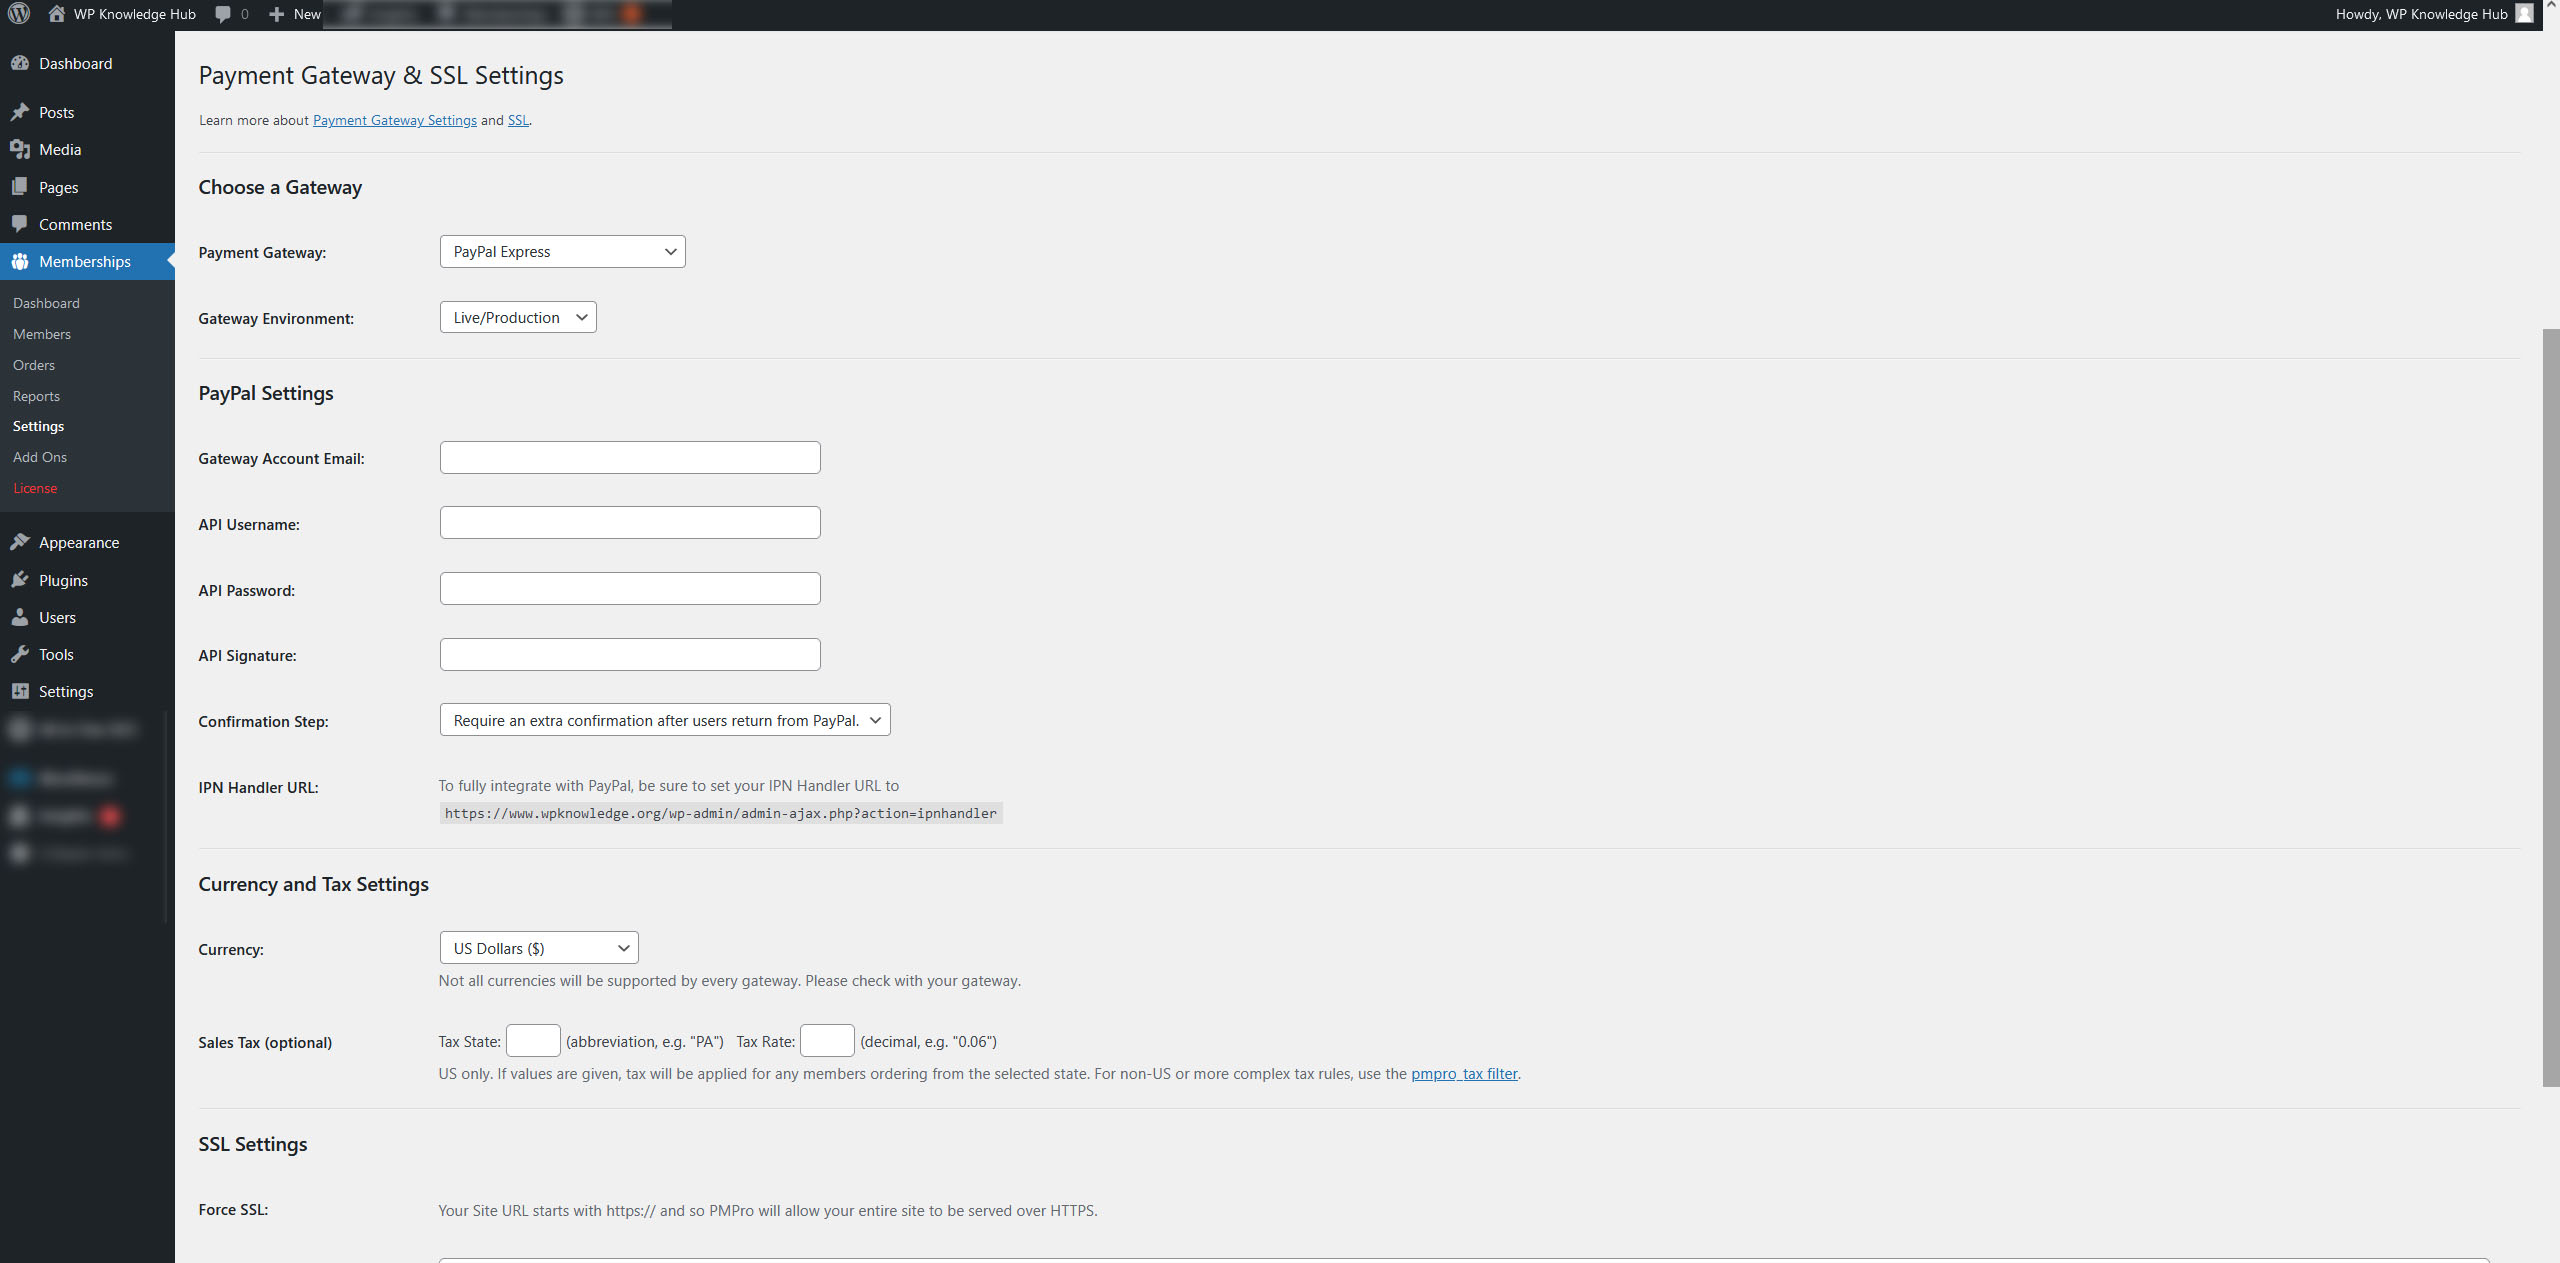
The first step is choosing a Payment Gateway. Popular choices include PayPal or Stripe. PayPal is a digital banking and invoicing platform, that holds your money in a PayPal account, from which you can choose which personal bank account to transfer to. Stripe is a payment processor that sends all purchases directly to a specific, predefined bank account. Make sure you research all the options and choose the one that best fits your needs.
When choosing a payment gateway, you can also choose if you want to a testing environment, or a live environment.
You’ll also have to setup your payment processor with the appropriate API keys from that account, which should be created independently. If you chose Stripe, simply click the Connect to Stripe button to launch the wizard.
If you chose PayPal, click here for more information about how to create your PayPal API keys.
Once you’re all done, don’t forget to Save.
Email Settings
Paid Memberships Pro comes equipped with automated responses to each action a user can take. From the WordPress dashboard, go to Memberships > Settings > Email Settings, to configure the initial email settings, like the From Name and the From Email Address. This is the information the client will receive when getting an email from your website.
Next go to Memberships > Settings > Email Templates, to personally customize each response to your site/requirements.
For example, if your website uses PayPal Express, and you sell memberships for a fancy cheese club, you could customize the “Checkout PayPal Express” email template to say:
<p>Thank you for joining the Fancy Cheese Club! Your Cheddar Pass is now active.</p>
!!membership_level_confirmation_message!!
<p>Below are details about your cheddar pass and a receipt for your initial membership invoice.</p>

<p>Account: !!display_name!! (!!user_email!!)</p>
<p>Membership Level: !!membership_level_name!!</p>
<p>Membership Fee: !!membership_cost!!</p>
!!membership_expiration!! !!discount_code!!

<p>
	Invoice #!!invoice_id!! on !!invoice_date!!<br />
	Total Billed: !!invoice_total!!
</p>

<p>Log in to your membership account here: !!login_url!!</p>
Advanced Settings
It’s important to take a look at these options, because they can add a bit of polish to the overall final product.
Here you can restrict WordPress dashboard access to subscribers, change the message settings, checkout settings, content settings, and more.
After setting up Paid Memberships Pro, you can now choose which pages will be restricted to the general public, and which pages have special access based on your membership levels.
How to Restrict Content Access Using Paid Memberships Pro
The final piece of the puzzle is restricting content. To do this, you’ll want to create unique pages or posts that are protected from the general public, and that can only be accessed by being a subscriber to one of your membership levels.
In this example, we’ll create a page called Cheese Club, that can only be accessed if a user purchased the “BRONZE” level membership. Remember that the membership pages we’re automatically created during the initial setup.
In the bottom right corner of the newly created Page, you will find a box that allows to check which subscription level is required in order to view this page:

Check the one you want, and publish it.
Now, to create the navigation that will allow users to sign-up, and view your restricted content after paying.
Setting Up Paid Memberships Pro on the Front-end of Your WordPress Website
Now that all the required pages are created, you can add them to your theme’s navigation to allow users to view their accounts, choose a membership level, and view the restricted content.
In the example below, we’ve added all the Membership pages under Membership Account, and we added the restricted Cheese Club page as well:

If any user tried to access the Cheese Club page before joining the BRONZE level membership, he will get an error message saying: This content is for Bronze members only.
Voila! You have successfully created a Client Portal/Membership website for your business!