Last Updated on April 24, 2022 by WP Knowledge Hub
If you’re thinking of starting an online store with WordPress, then your best bet (and almost your only one) is the WooCommerce e-commerce plugin. It makes creating, managing and selling products easy with its all-in-one e-commerce solution! With the free version of WooCommerce, you can setup your store pages (shop, cart, checkout and account pages), create products, manage inventories, sell physical or digital products, manage your orders, and connect your store to payment gateways such as PayPal and a few other options.
WooCommerce also has a WIDE array of premium add-ons that allow you to do almost everything else your merchant heart desires!
That being said, if you haven’t explored or considered alternative e-commerce platforms other than WordPress, such as Shopify, you might be missing out on something that’s more tailored to your business. WooCommerce is a wonderful plugin, but it’s mostly self-managed and can be very bulky, so if you’re a more streamlined shop and you feel like having 24/7 tech-support is essential to your survival, Shopify might be a better option for you.
If you’ve decided to work with WooCommerce, then let’s break down how to build an ecommerce site.
Here are the steps to launching your e-commerce website with WordPress:
- Choose a great theme
- Setup WooCommerce
- Create products
- Install extensions
- Market Your Store
Choosing a Theme For an e-Commerce Website
Your ‘theme’ (theme meaning the set of templates you choose, not the subject) will act as the basic design for all the content on your WordPress website. The theme establishes the basic look-and-feel of the website, and while it is customizable to a certain degree, it’s best to choose a theme that fits your business.
In other words, choose a theme that you like, and that works well for your target audience.
When choosing a theme, make sure that you choose one or buy one that has a pre-designed set of templates for e-commerce. You should start by researching which are the best e-commerce themes for your type of business and go from there. There’s plenty of great free options, such as Astra, or paid options like the premium themes you’ll find on popular third party sites like ThemeForest.
Some of the best popular WordPress themes that have TONS of pre-built demos include:
- Avada
- The7
- Bridge
- The Gem
- and more…
In the following example, let’s use The Gem’s Watches Shop demo to build an online watch store:

Setup Your WordPress Online Store with WooCommerce
Start by setting up your theme and downloading the pre-built demo of your choice (the one that best matches your content). Remember, in this example we’re using The Gem to build an online watch shop, but you go ahead and purchase and setup the theme and demo that best suits your target audience.
Once you have your theme installed, you’ll want to go to Plugins > Add New and search for WooCommerce if it didn’t already install it as part of your theme. You’ll want to choose the one by Automattic. Be weary of any other plugin piggy-backing on WooCommerce’s name. Install it and activate it, and you’ll be taken to a setup Wizard.
1. Store Details
To start, you’ll need to fill out your store details, which is very simple:
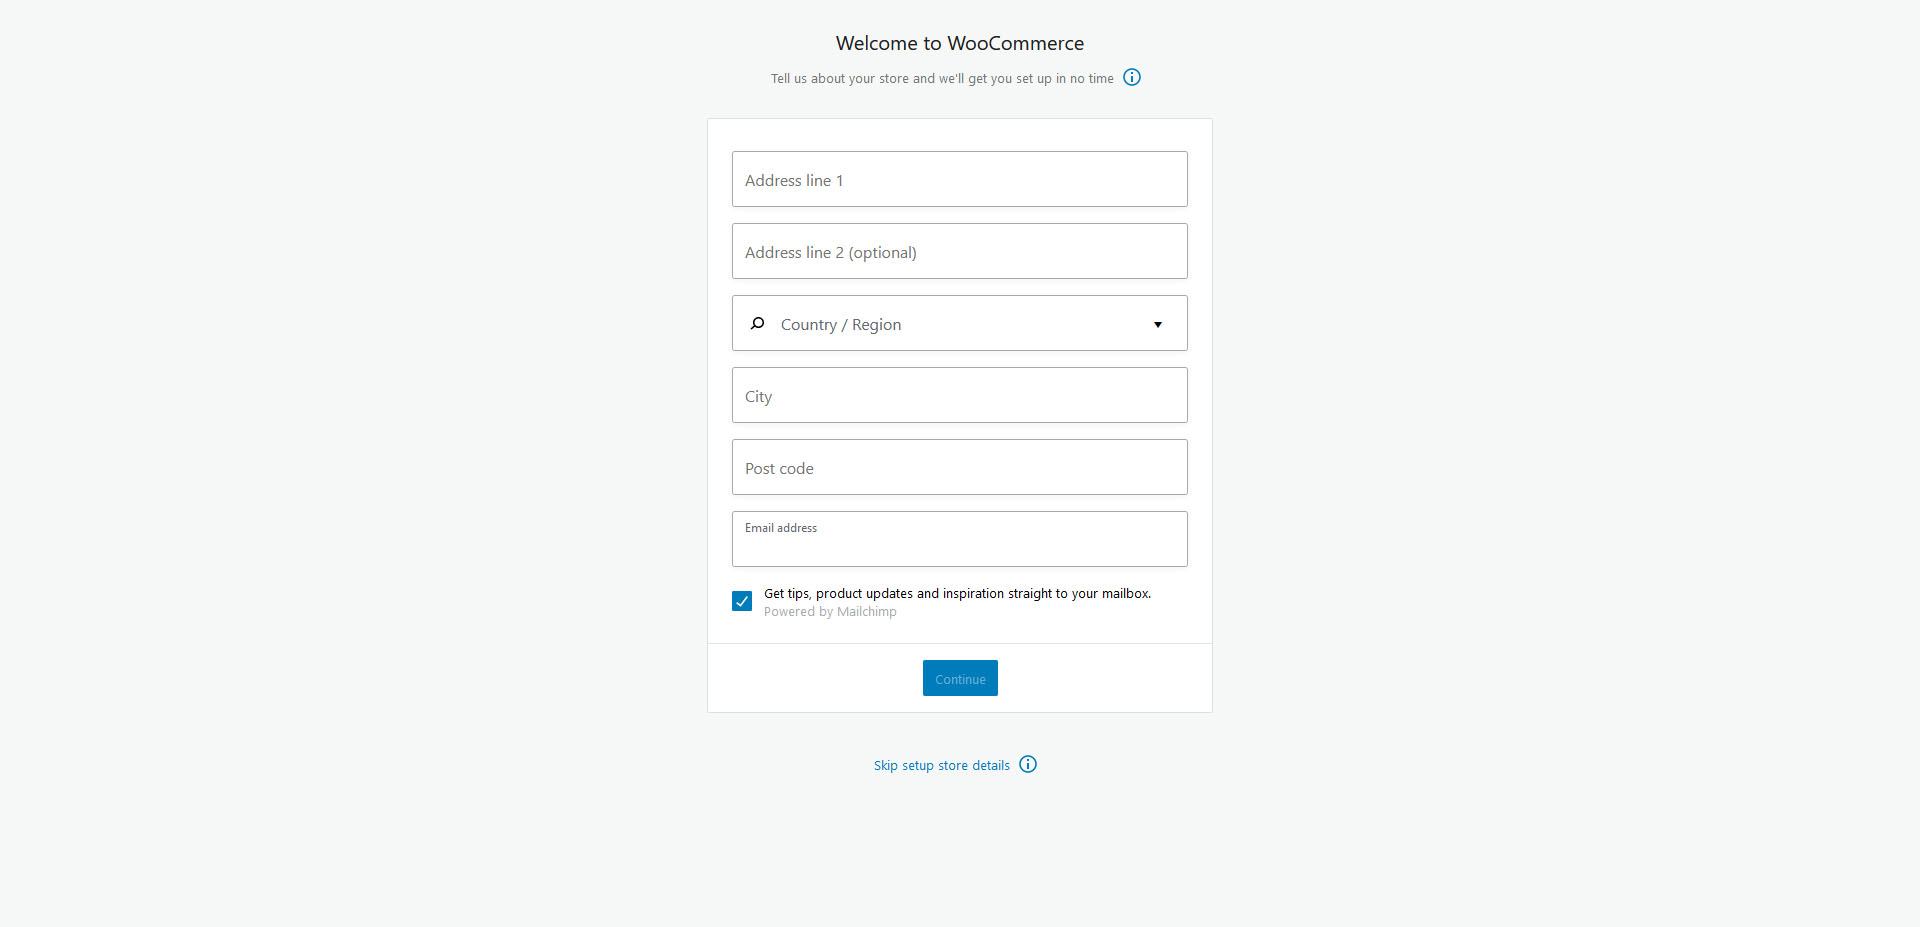
You’ll be asked to participate in data collection, but you can decline. Next is the Industry Type.
2. Choose the Industry That Applies
The next step is to choose the industry for your business.
This step is once again very self-explanatory.
3. Product Types
Next, you’ll be asked to choose your product types – physical or downloads. Choose physical products if you plan on shipping products that you sell, and choose downloads if what the user is buying is purely digital.
In our example store, we would be selling watches – which is physical. You can also select both if you plan on selling something like a physical book with a digital copy as a bonus, for example.
4. Business Details
You’ll have to answer a few more questions about your business here, all very straightforward.
When asked to add all the “free features”, I recommend declining this offer, as more add-ons and more plugins tend to create a bulky franken-site and slow down the loading speed. Unless you know you need some of these tools for very specific reasons, uncheck them all and proceed to the next step.
You don’t have to commit to anything forever. It’s really easy to add these later on.
5. Choose a Theme
Finally, you’ll be asked to choose a theme, but you can scroll down to the bottom and skip this step.
This is for anyone who didn’t already choose one. If you already did, click Skip This Step.
Get Ready to Start Selling with WooCommerce
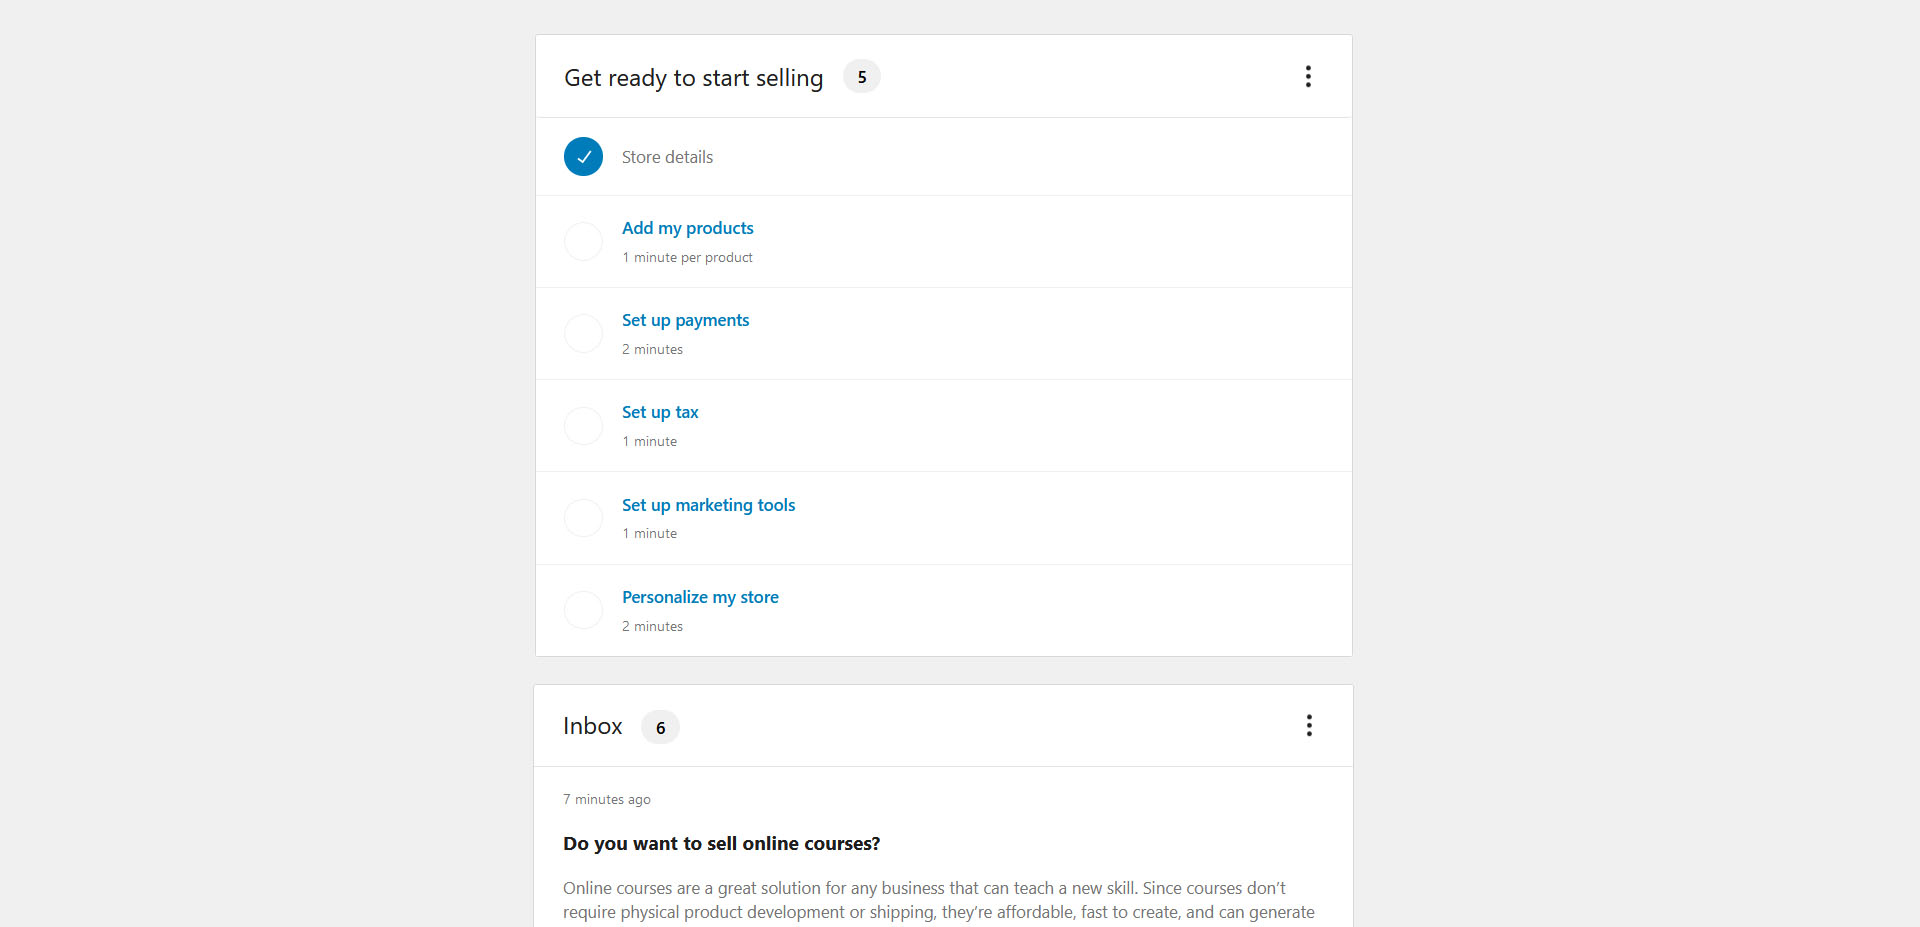
Once you’ve completed the initial WooCommerce configuration – you’ll see a screen inviting you to add your first product.
If you don’t, click on the new WooCommerce tab in your WordPress dashboard and you’ll see this screen:
Now you can start creating products. Before you start, for every product you want to sell, you’ll need to have the following information ready:
- Product name – e.g. Black Metal Watch
- Price – e.g. $385.00
- Main product image – the main image of the product, one that really makes it shine
- Additional product images (optional, but recommended) – include pictures from as many different angles as possible, and add closeups of finer details
- Product description (long) – you’ll want to describe this product in detail: where it’s from, what it’s made of, how it works, how much it weighs, its size, etc.
- Short product description – a simple catchy one sentence description of the product.
- Product category – this helps your SEO efforts by improving your site’s navigation
Adding products with WooCommerce
When adding products to WooCommerce, you should first understand what kind of product you are selling:
- Simple
- Grouped
- External/Affiliate
- Variable
- Downloadable
- Virtual
If you want more information about each type of product, visit the WooCommerce detailed guide that explains what each product types are, and how to use them.
Remember in our example, we are selling watches. The Black Metal Watch product would be a simple product because it only comes in one color and one size. If we we’re selling the Black Metal Watch with options, such as size, where different sizes cost a different amount, it would become a variable product.
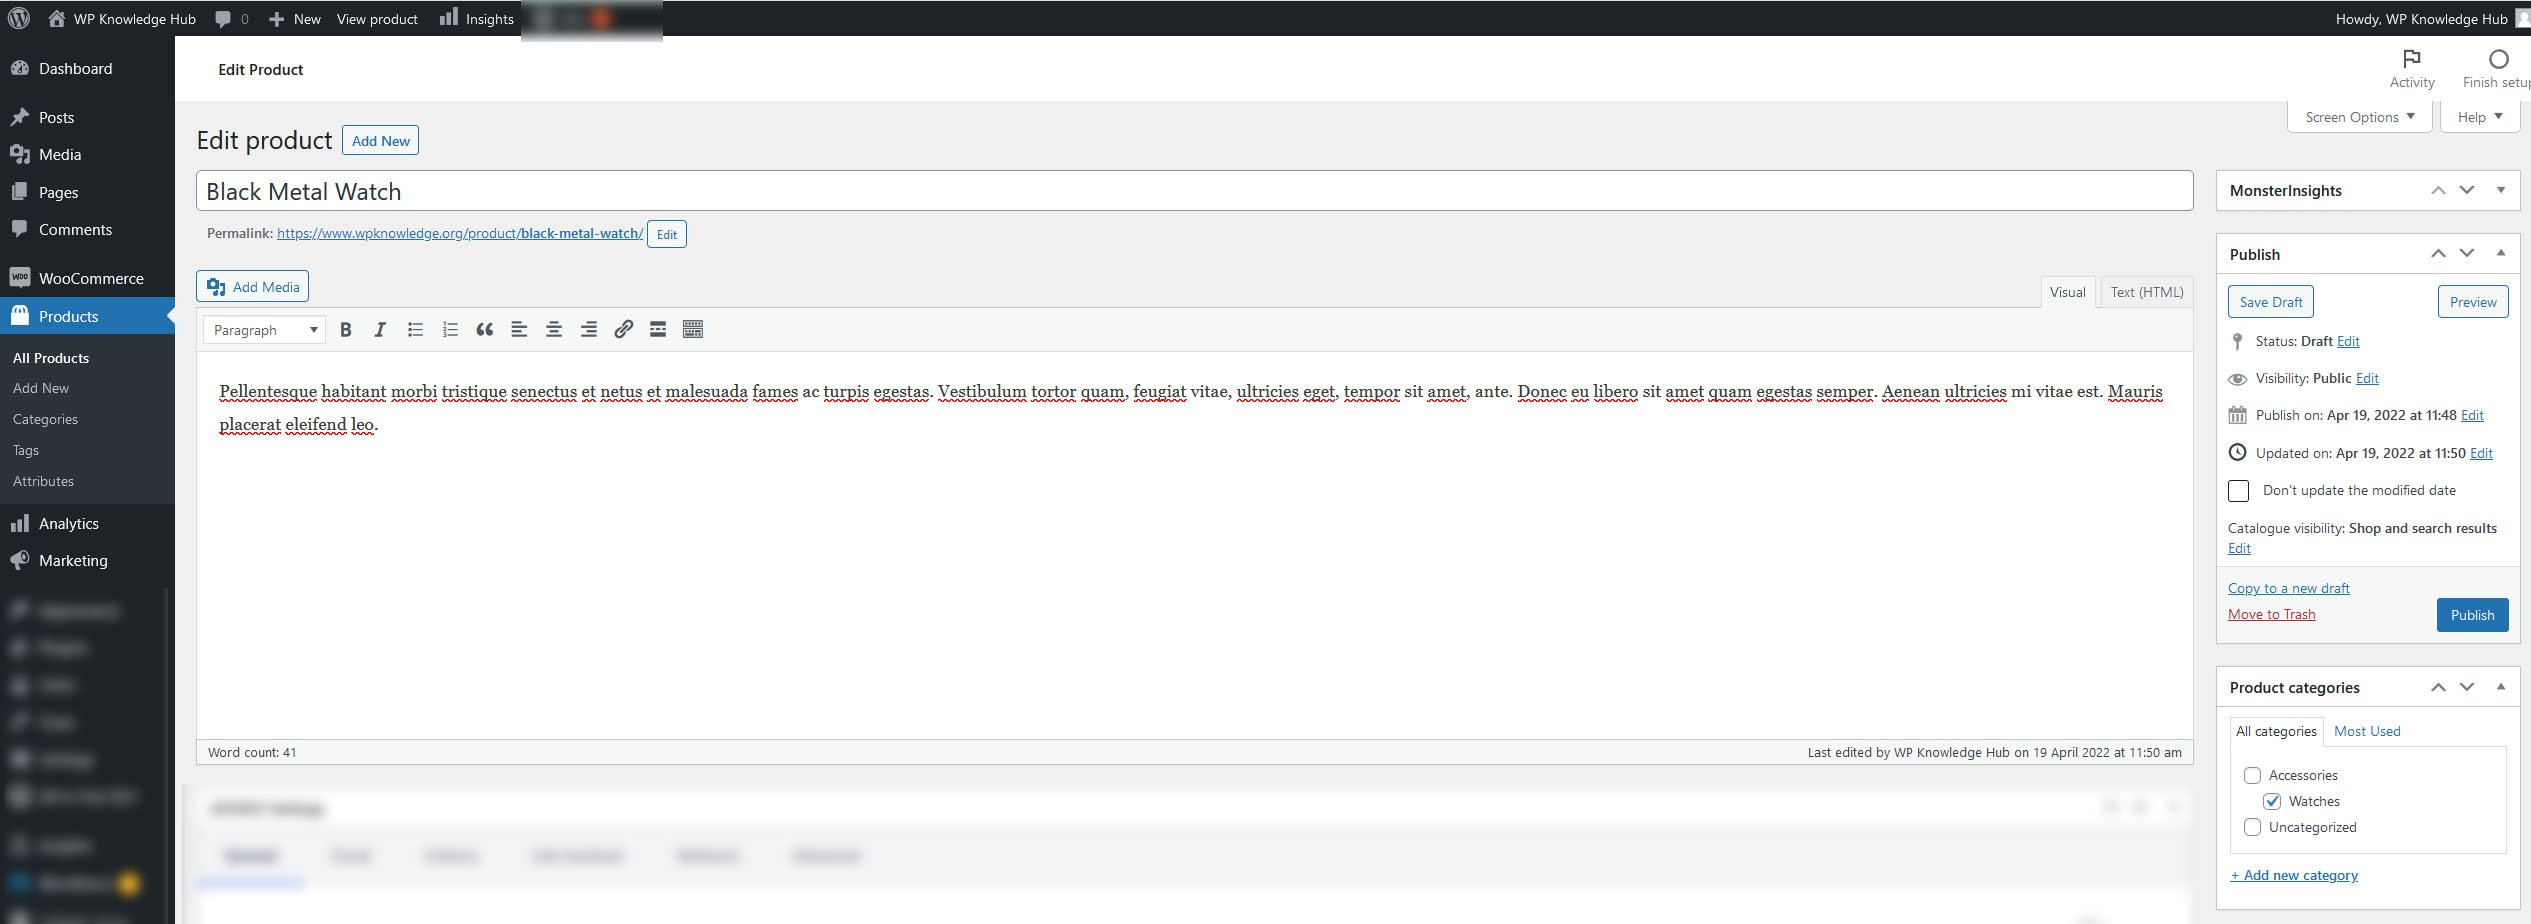

In the images above, you can see how we’ve populated the new Black Metal Watch product with all the information we included above. We have a product title, a long description under the title, a product category on the right side (Watches), a price, a short description and a product image.
Once you’ve added all this information for your own products, you can now move on to the inventory and shipping details in the Product Data box below. Just remember that these details are specific to your business, so you need to go though each option and make sure you enter it correctly.
Once you’ve done all that, you are ready to publish your products and make them live!
Setup Payment Gateways So You Can Get Paid
Now that you have created your first products, you can start selling them and making money! Exciting! In order to do this, you’ll need to setup one or more payment gateways.
What is a WooCommerce Payment Gateway?
A payment gateway in WooCommerce is something that allows customers to pay for the products they want to buy using a payment system. All of these require an account with the Payment Gateway company. Typically this is called a merchant account.
To get started, you’ll need to go to WooCommerce > Settings > Payments, and select the option you want, or add an extension plugin that gives you more flexibility.
If you have a WordPress.com account, you can setup WooCommerce Payments by clicking the Install button next to it. If you are self-hosting your own WordPress site (GoDaddy, InMotion, Dreamhost, HostPapa, etc.), you’ll need a third-party payment gateway such as PayPal, Stripe or Moneris.
All three examples above offer plugins that you can simply purchase, install and activate to add more Payment Gateways to this settings page.
You can see the full list of all available WooCommerce Payment Gateways here.
Installing WooCommerce Extensions
As your store grows, you’ll probably notice that the WooCommerce basic free plugin is not enough for your business anymore, but don’t worry! WooCommerce has an extensive list of extensions that focus on a variety of things such as: security, analytics, bookings, shipping add-ons, taxes, custom fields, reviews, and more!
Check out the WooCommerce Extension store for more details!
Displaying Products on Your Website
Now that you’ve created your products and setup a way to get paid, it’s finally time to display the products on your website. At the core of the WooCommerce experience is the /shop page, which you can use to display all your products on one page.
From your dashboard, you can set this /shop page to be whichever page you want by going to WooCommerce > Settings > Products.
To display the page in your website’s main navigation, you simply need to go to Appearance > Menus > Select your primary menu, and add “Shop — Shop Page” to menu. This will create a link to your website’s shop page that users can now access to view your products in a grid format:
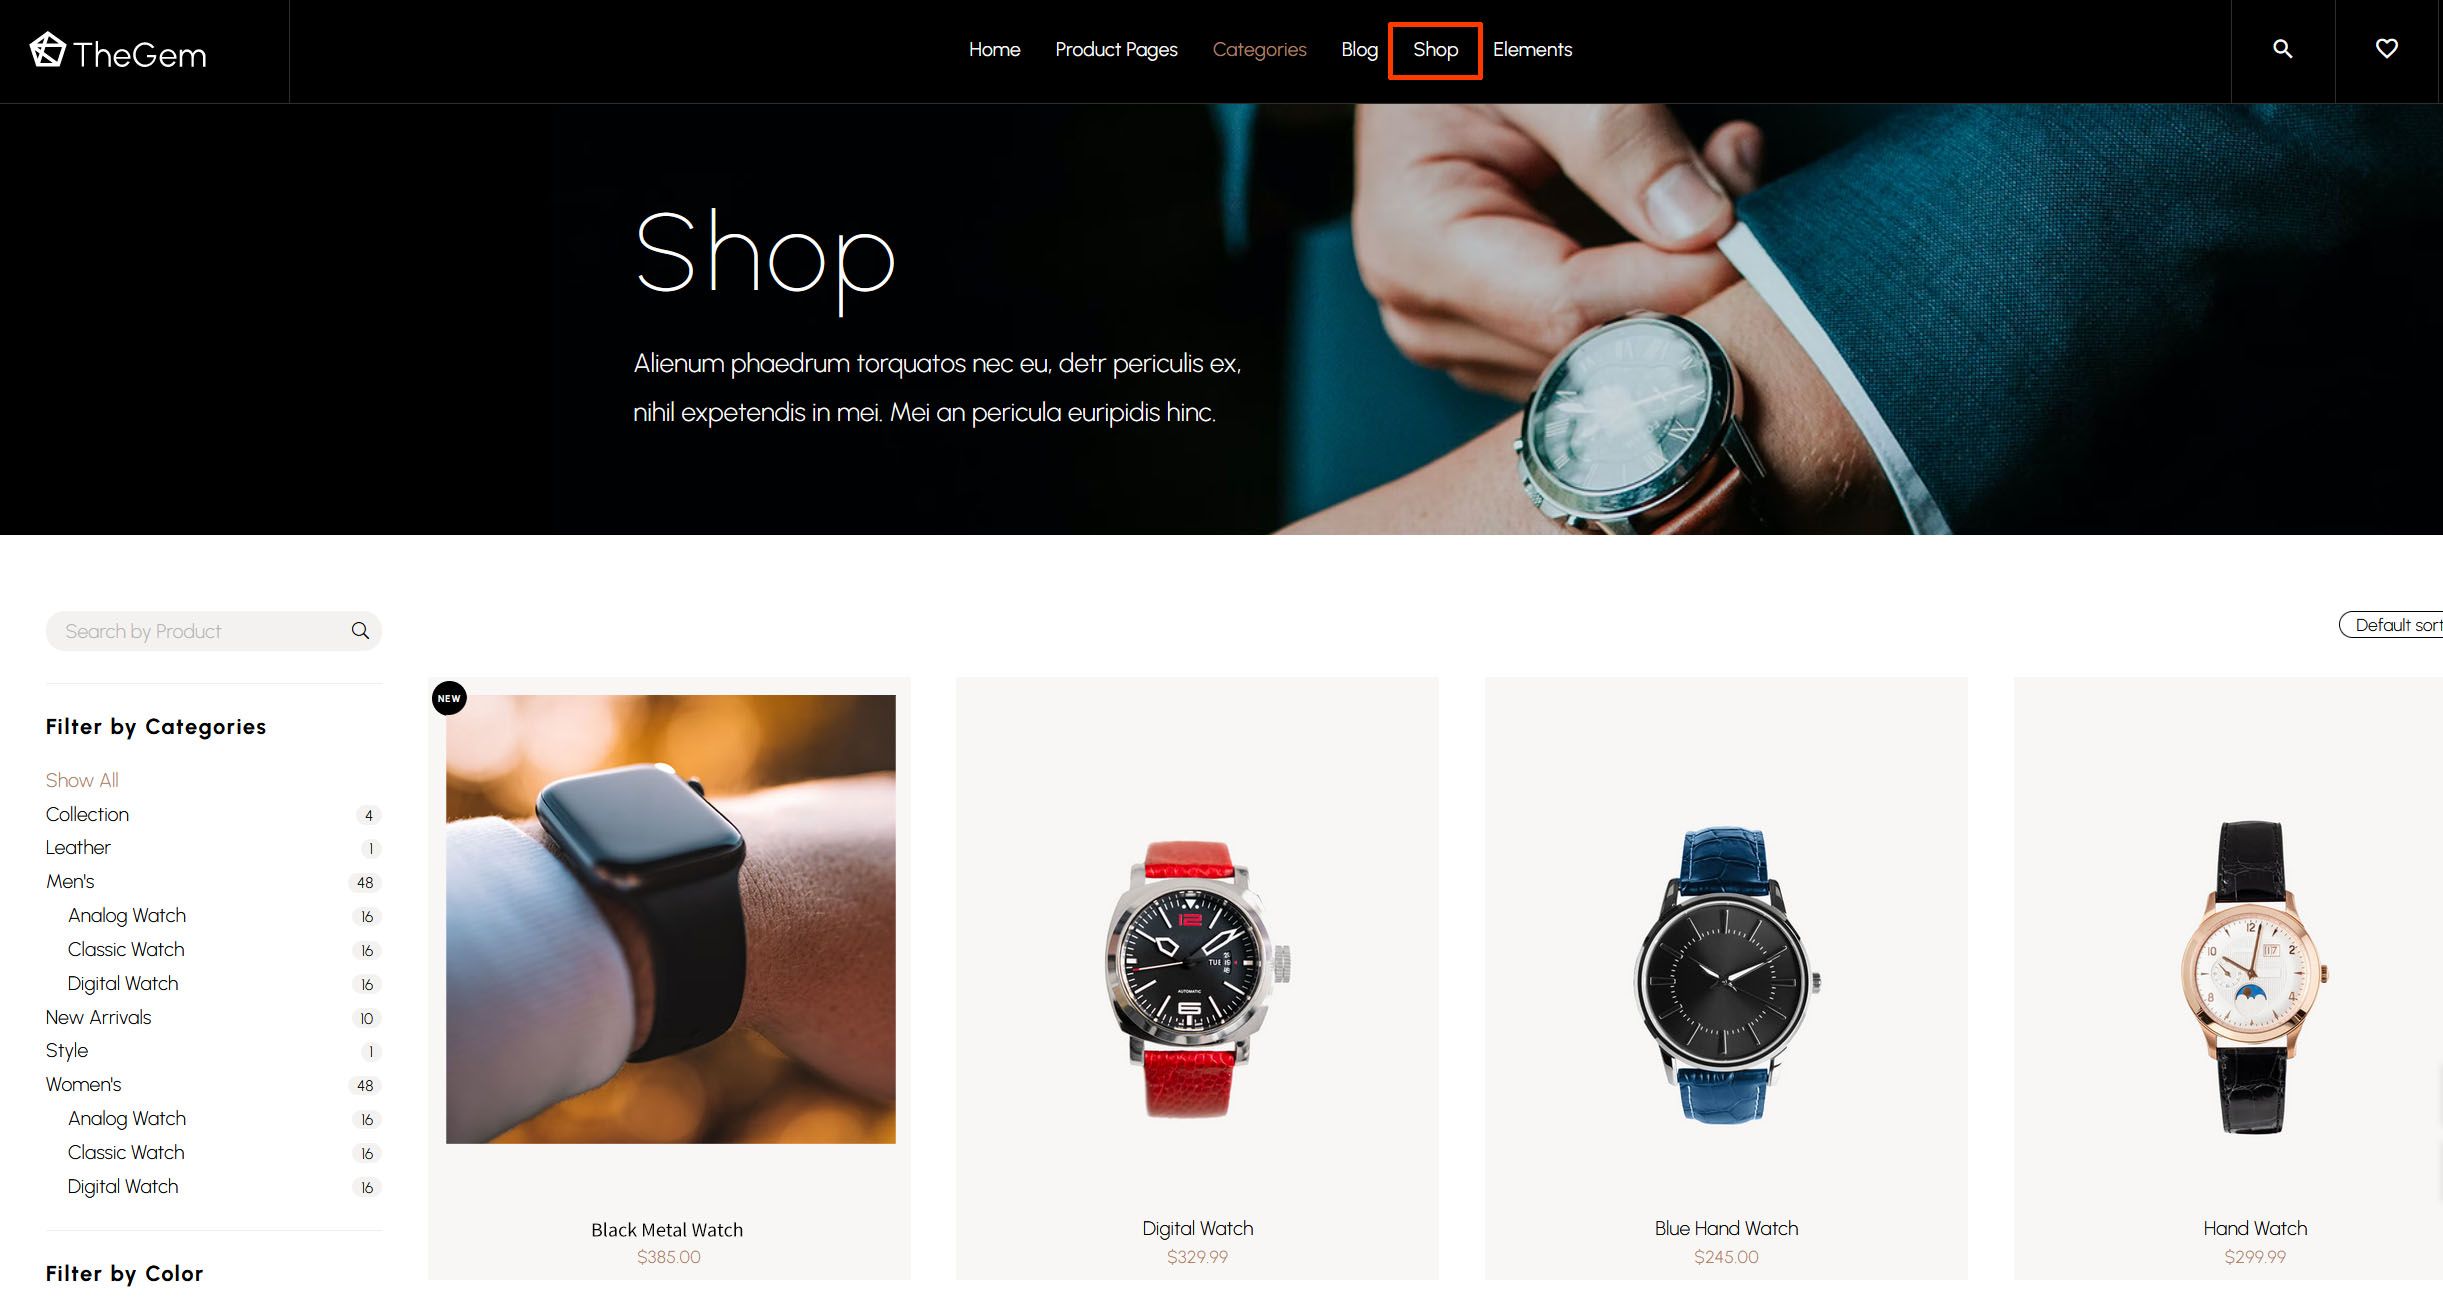
That’s it! Users can now browse your site, find the product they want, and buy it. Whenever a new order comes in, you will be notified via email and you can manage your orders by going to WooCommerce > Orders.
You can also change any email template that auto-generate confirmation messages to the users, and those for the admin as well. To do this, just navigate to WooCommerce > Settings > Emails.
This is just a broad overview of what WooCommerce can do, but it’s just barely scratching the full potential of this amazing e-commerce plugin.
Not only does it create the entire backbone of your e-commerce website, but it can also help you with your marketing efforts.
Marketing Your Store
Word to the wise – just because you build it, doesn’t necessarily mean they will come. When I say ‘they’, I mean users, and when I say ‘come’, I mean buy.
Having an e-commerce store is just the first step in getting your business off the ground, but there is a lot more to it than that. Sure, organic SEO goes a long way, but it’s important to know that setting up online stores is so simple with today’s technology, you are probably going to be facing some stiff competition unless your product is very niche.
WooCommerce makes it a bit easier by providing complex analytics about your store’s performance, and a marketing tab where it will make suggestions on which extensions to use to reach different audiences.
They offer extensions to help get your business on social media platforms, they can help with email automation, Google Ads, and more!
All in all, you need to set realistic goals about what you want to achieve using WooCommerce. The plugin makes it easy for you to setup your store, but the future of your brand is in your hands!