
Last Updated on May 25, 2022 by WP Knowledge Hub
Are you looking to speed up your website like never before using the best caching plugin for WordPress?
W3 Total Cache is one of the most popular plugins and it can definitely help you mprove the speed and performance of your WordPress website!
Why Install W3 Total Cache?
Caching data means temporarily storing assets to rapidly access them when they are needed, so when a user visits your site, your server doesn’t have to download everything every single time.
Doing this would use up more resources uselessly, which is why caching was invented. Caching plugins are an extension of this, and allow WordPress websites to ‘cache-in’ on this technology (get it?).
W3 Total Cache is the most robust caching plugin that offers tons of advanced features to fully optimize your caching settings on your WordPress website. The best part – it’s all FREE! You’ll need to install the W3 Total Cache plugin from the WordPress plugin repository.
Initial W3 Total Cache Setup
Start by going to Plugins > Add New > and searching for W3 Total Cache. Install the one with the 3 little cubes as the plugin icon, then activate it.
By activating W3 Total Cache, you’ll be redirected to the plugins page, and you will now notice a new tab in your WordPress dashboard’s left side bar: Performance. Click on it, and you’ll be taken to a new screen, the Total Cache Setup Guide:
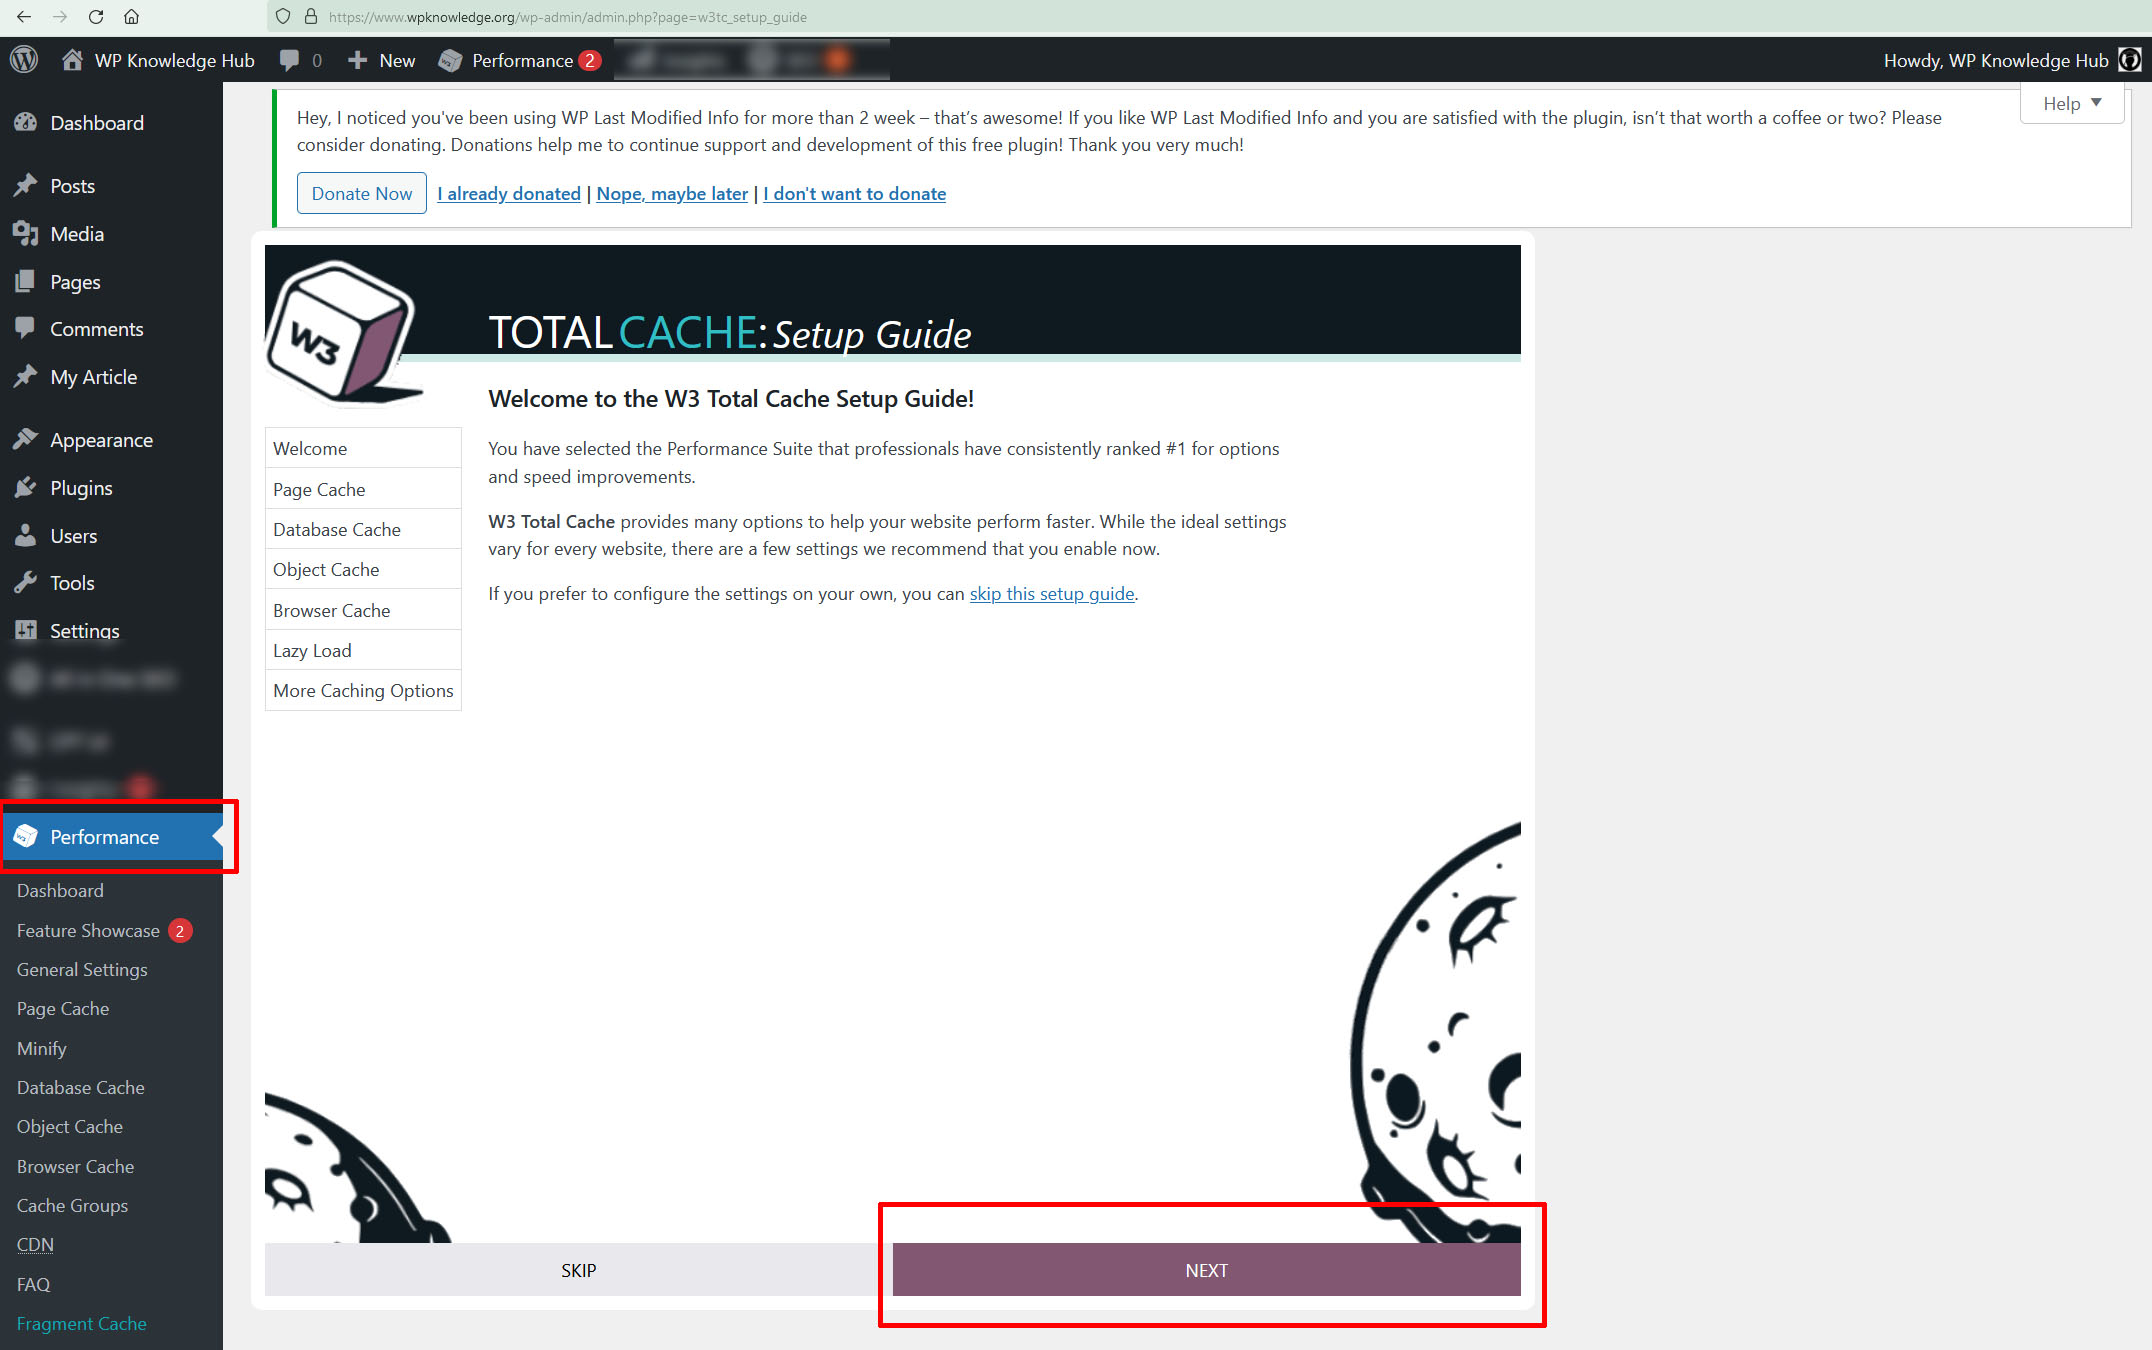
You might be asked to authorize the collection of data to improve performance. After you make your decision, click on NEXT at the bottom to start the setup wizard.
The first step is to test the page cache. Once you click the button, you will be presented with different storage engine options. For beginners, it’s best to simply choose the recommended one. In the example below, it’s Disk: Enhanced:
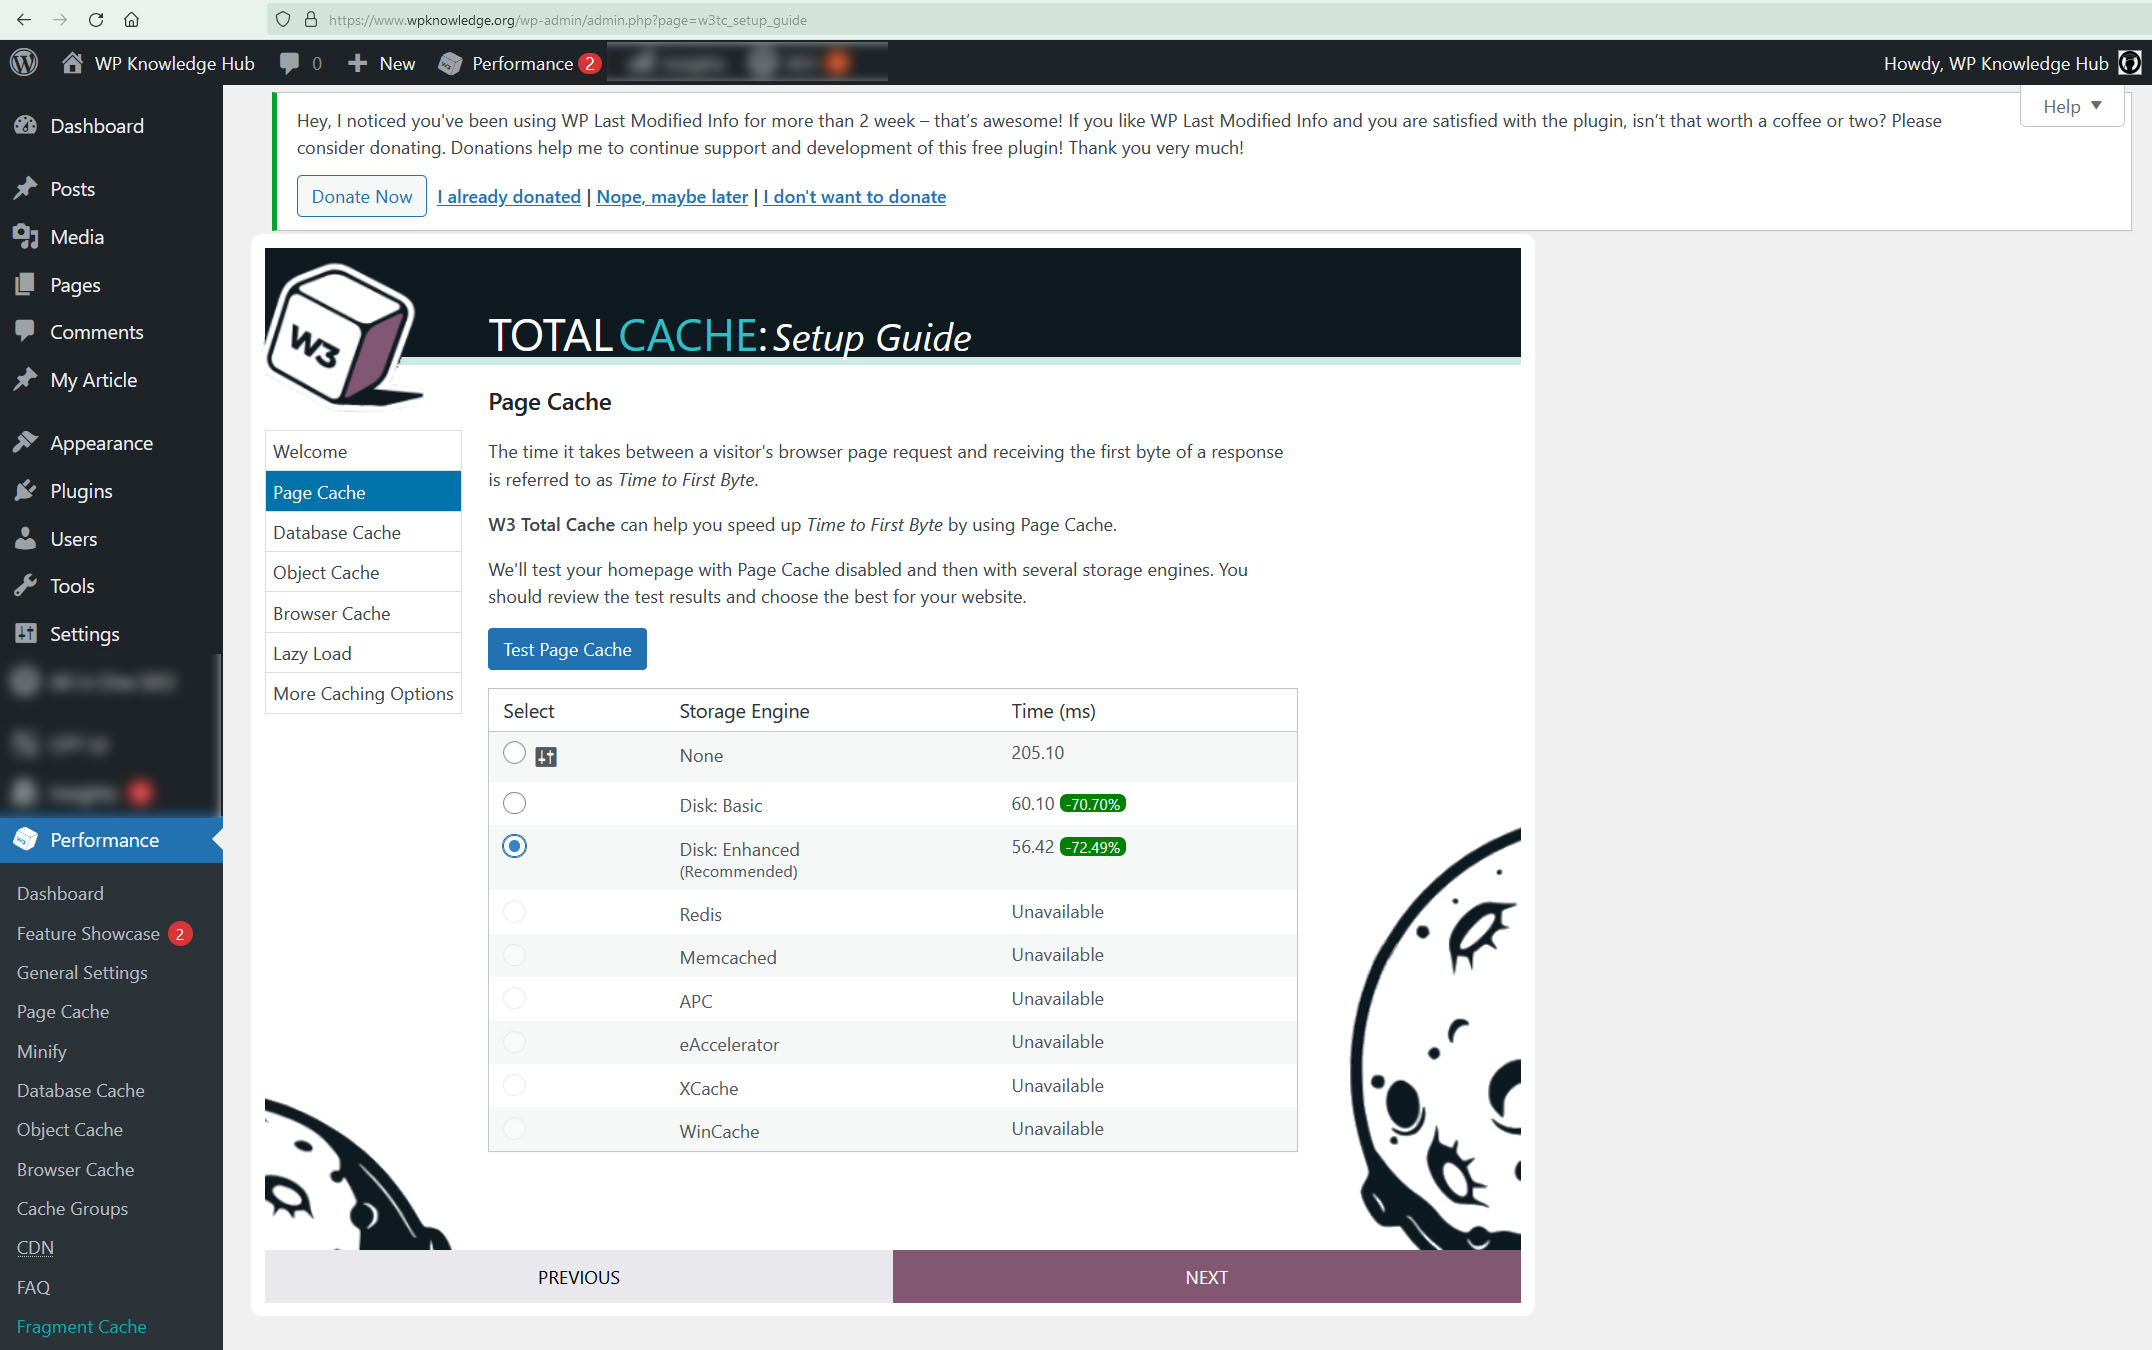
Repeat the process for the Database Cache, and Object Cache. If the time savings is in the red (negative), it’s best to leave the selection on NONE.
When you reach Browser Cache, you’ll notice it’s a bit different. Simply click the button again, and choose the second option, ENABLED.
We also recommend enabling Lazy Loading images. Lazy loading is an optimization technique that only loads content on a web page when the user needs it (scrolls into view) as opposed to try loading the entire page all at once, which slows down the website.
Once you’re all done with the initial setup, click the Dashboard button in the bottom right, and you’ll be taken back to the dashboard, where you can now choose Performance > General Settings for further optimization.
Ideal W3 Total Cache Settings (2022)
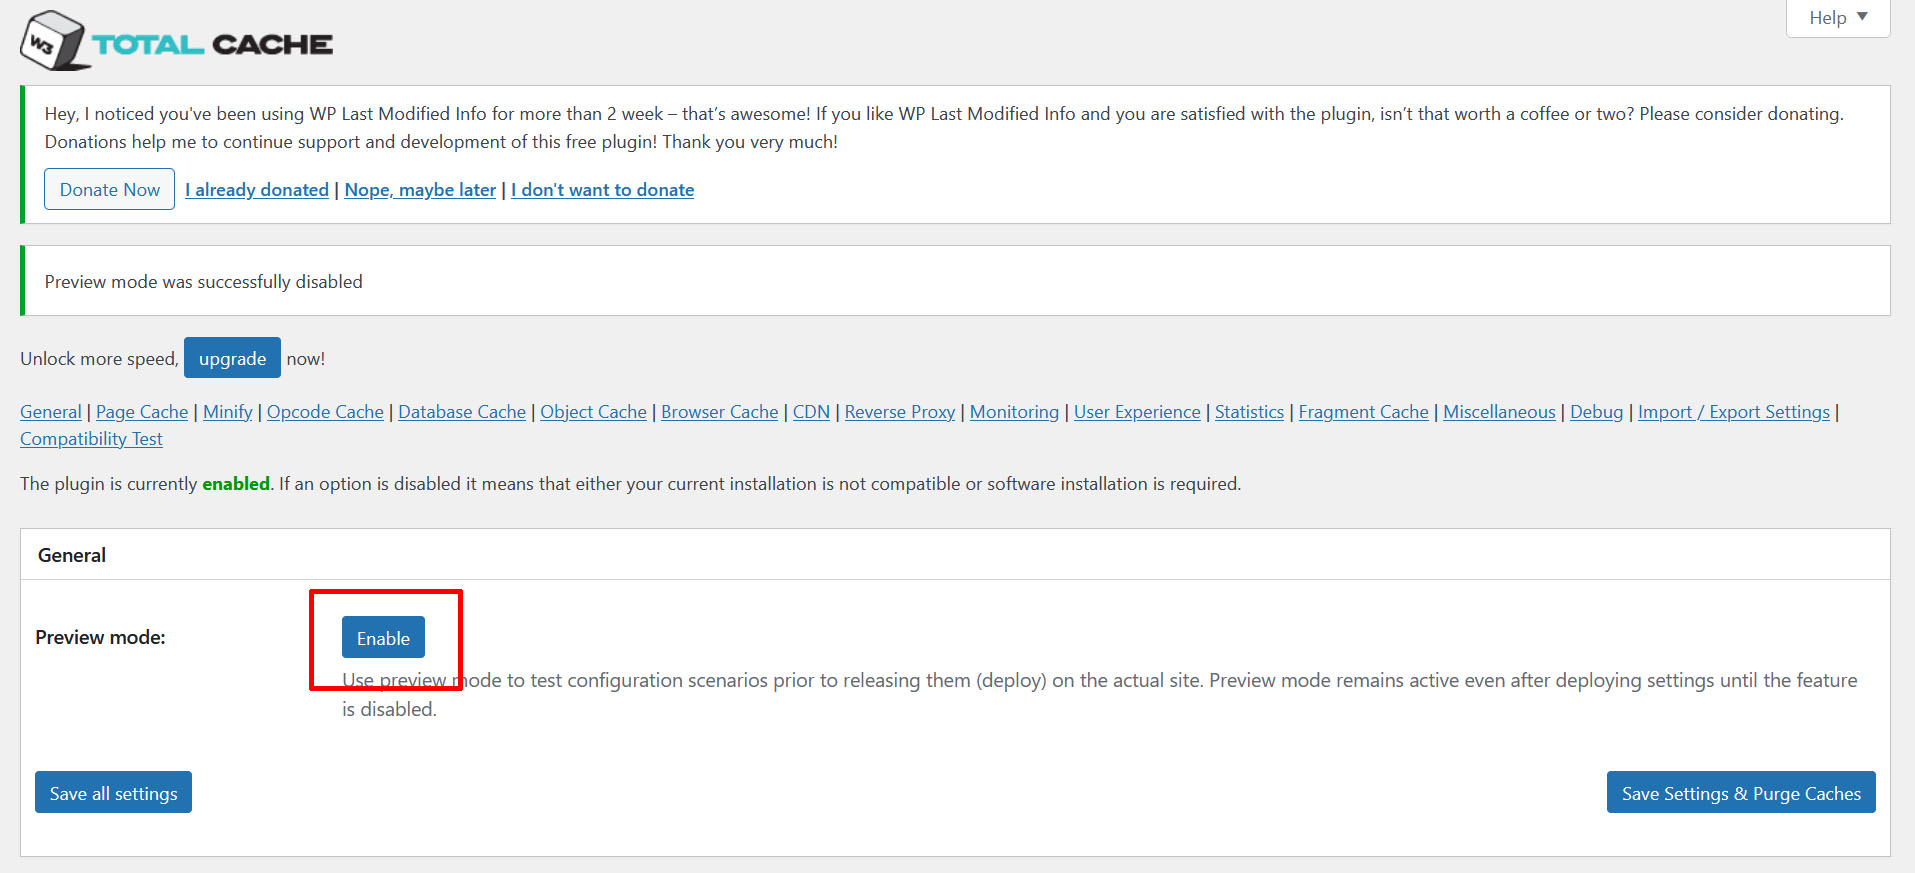
Before you start playing with the settings, you’ll want to turn on PREVIEW MODE by clicking the blue ENABLE button in the General > Preview Mode settings:
General Settings:
Page Cache
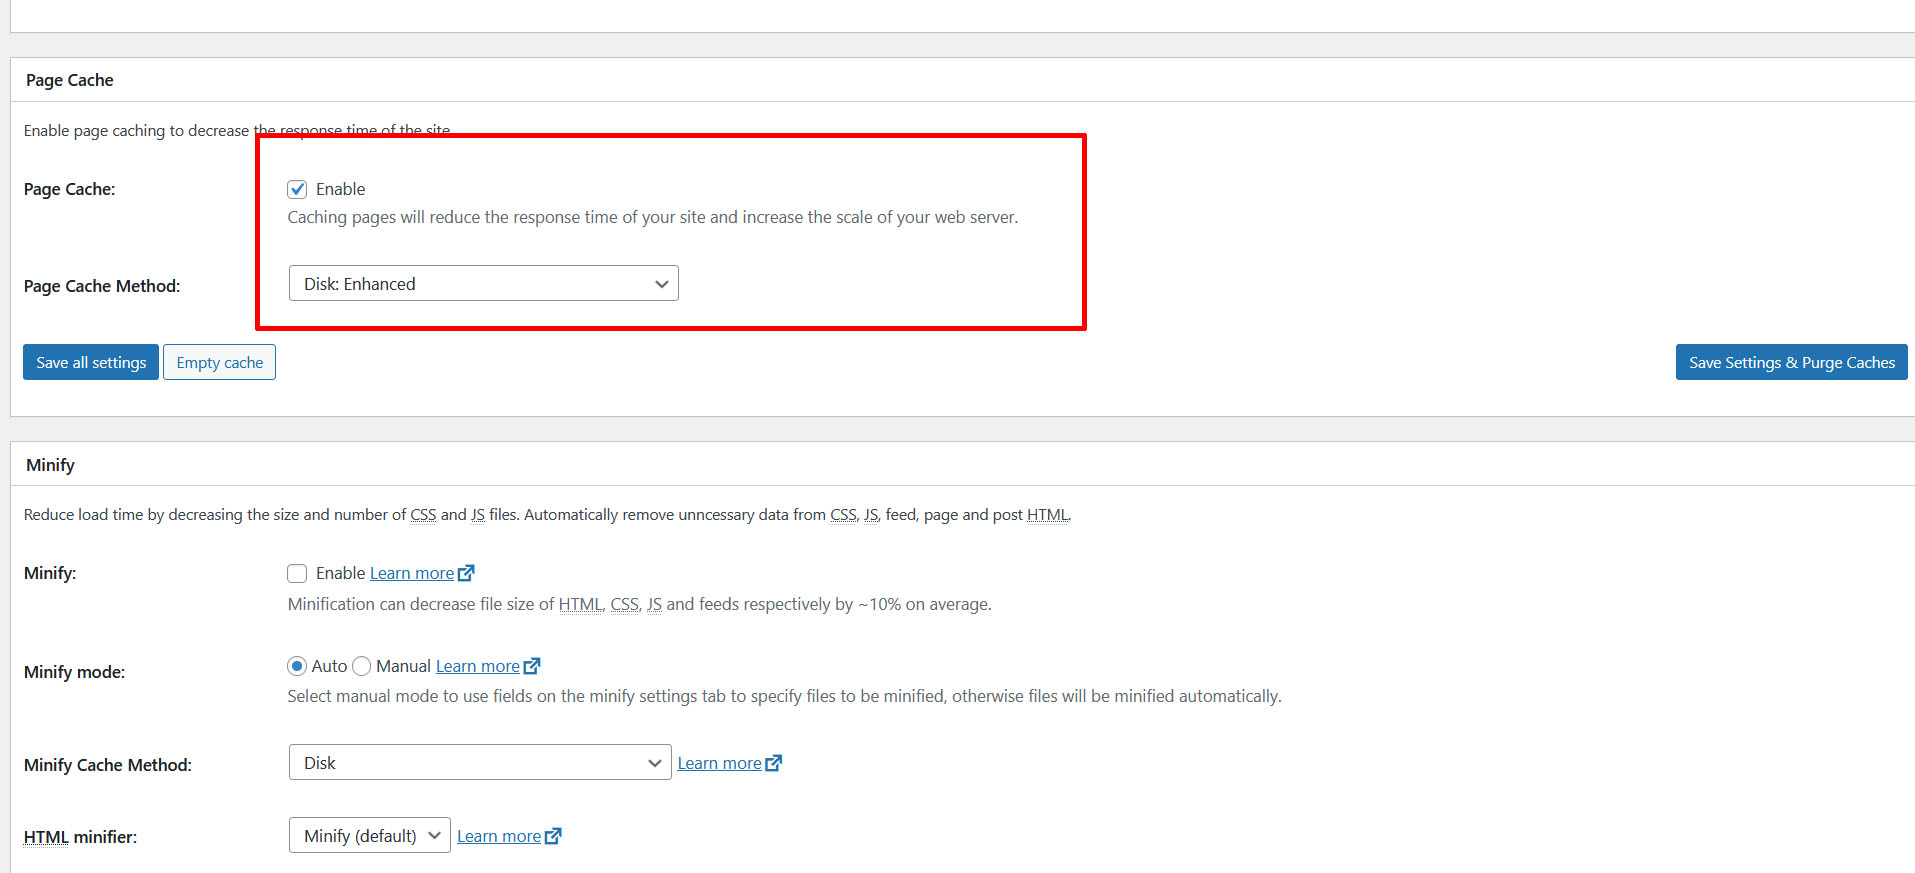
If you did the initial setup wizard, your page cache should already be enabled and set to the optimal mode. If this is the case, leave it as-is. If it’s disabled, we recommend enabling it:
Minify
Using the Minify feature will compact and reduce the total size of your HTML, CSS, and JavaScript assets by compressing them. For the typical WordPress website, enabling this and choosing the “Auto” option will work just fine:

When you turn this on, you will be prompted with a warning message that this setting can break your site. If you accept the risks, simply click that button, and remember to PREVIEW your website in preview mode at the top of the W3 Total Cache settings page to make sure it works before saving.
If you are satisfied with the results, click Save Settings & Purge Caches.
Opcode Cache
We recommend leaving this setting as-is and not touching anything.
Database Cache
We recommend keeping this setting disabled and using the object cache instead. Database caching can be effective under the right circumstances, but it often causes all sorts of issues with other plugins.
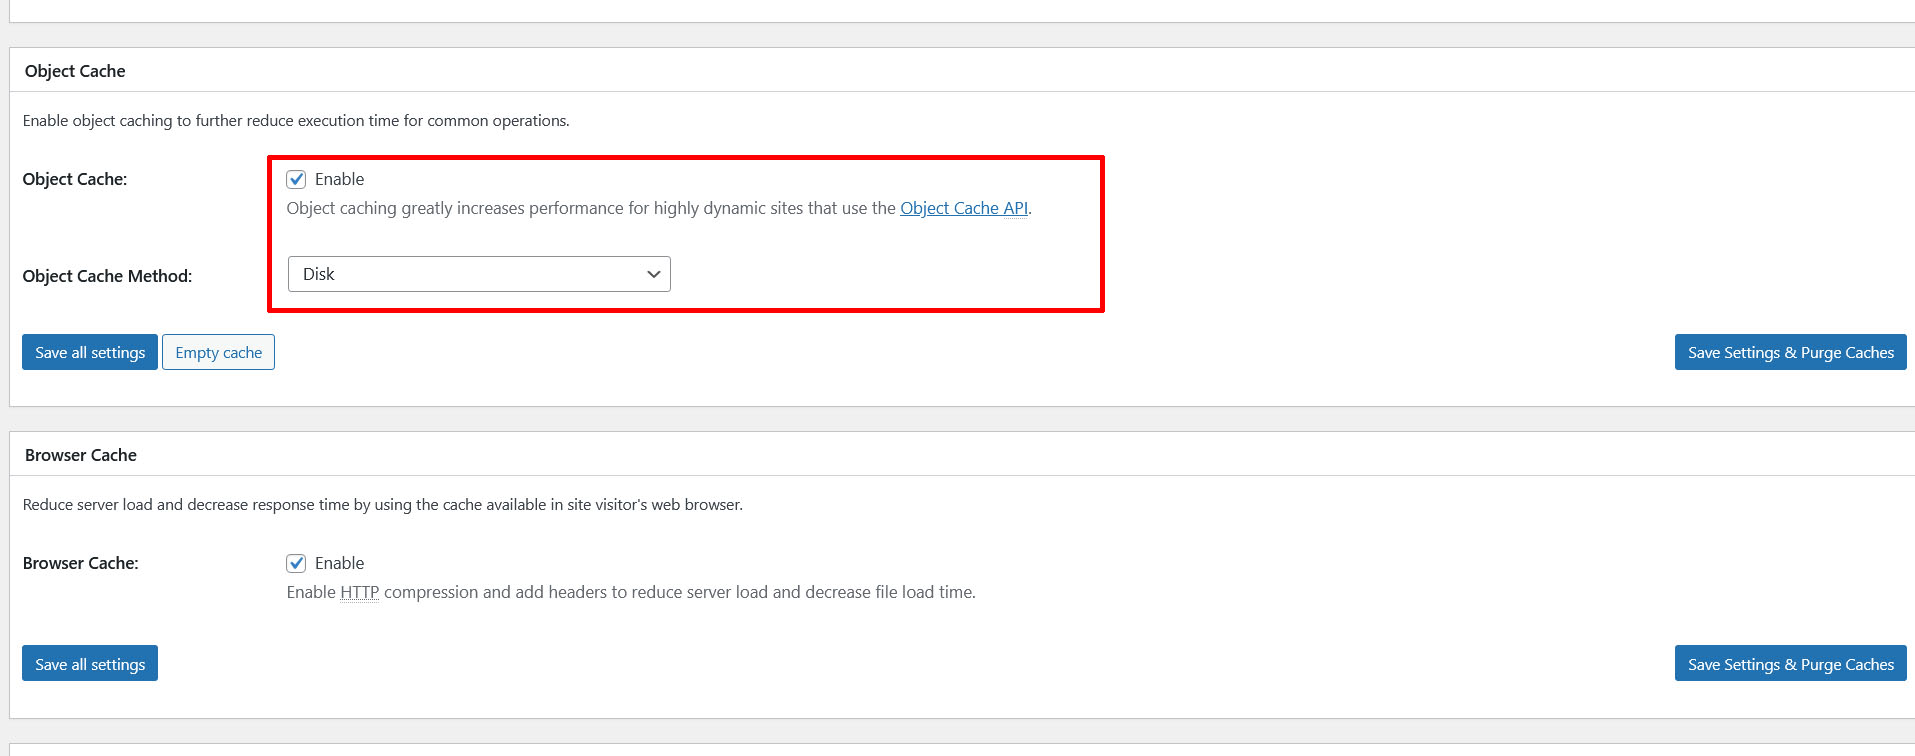
Object Cache
While WordPress has a built-in Object Cache, it only works for a single page load, and so enabling this setting increases the performance of your website. If you ran the intial setup wizard, this setting should already activated. If you didn’t we recommend that you activate it, like so:
Browser Cache
Browser caching is the classic definition of caching, and is the basis for caching static files on the web. Browser caching can speed up your WordPress site a lot by storing static assets like CSS, JavaScript and images in its memory. If you ran the setup wizard, this setting should also already be activated. But if you didn’t, activate it now.
CDN
W3 Total Cache actually let’s you connect a CDN directly, but if you followed our Cloudflare setup guide, you won’t need to do this. For beginners, we recommend leaving this setting for now.
User Experience
Unless your website is very emoji heavy, you can choose to disable emojis here by selecting Disable Emoji and Disable wp-embed script. This won’t be a huge performance boost, but it will shave a few bytes of the total page size.
Miscellaneous
Skip ahead to this final setting, and you’ll be presented with more settings (there’s a lot, we know!). Here you can tweak and test a few things, but we recommend leaving these settings as-is unless you have a specific reason for changing them.
In our opinion, the only real setting of value for the average website is Optimize disk enhanced page and minify disk caching for NFS. This is an option that could give your site a modest performance boost, but make sure to test it in PREVIEW mode before choosing to leave it on.
Advanced Settings:
Now it’s time to go through each tab in the Performance settings to see if you can fine tune your W3 Total Caching plugin to make your site EXTREMELY fast, and blow away your competition!
At this point, your website should already be blazing fast. You can always test your site speed at any time with GTmetrix to see how your site is faring:
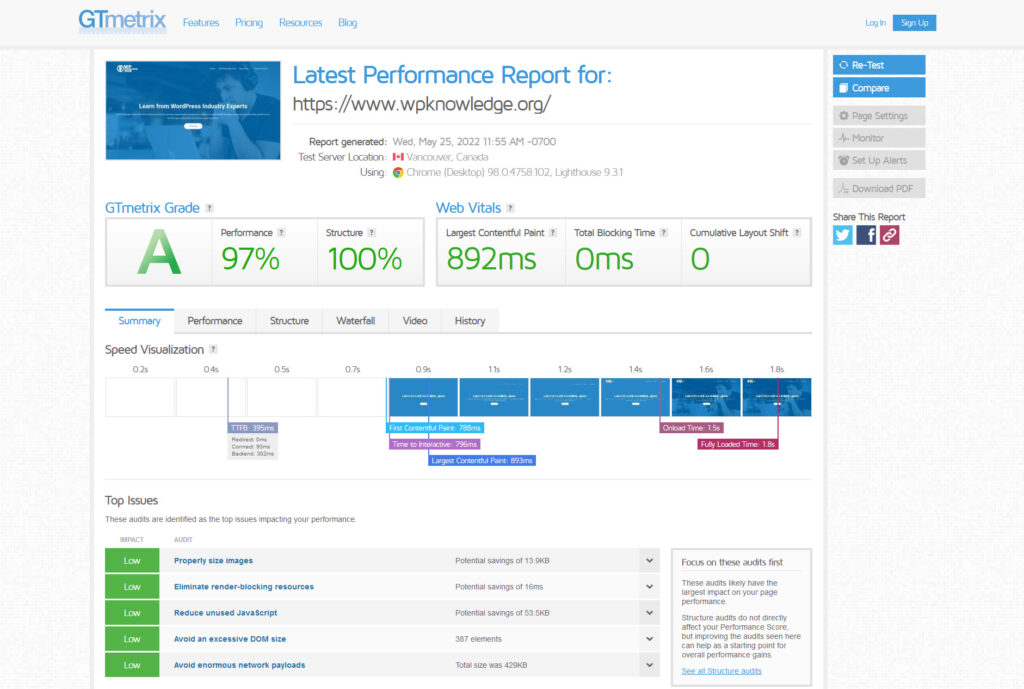
In the example above, we can see that wpknowledge.org is already about as fast as WordPress can possibly get, and continuing to try to increase the speed would probably be an excercise in futility (or perfection), but in case you want to keep going, go to Performance > Page Cache. Note that this is NOT the same place as Performance > General Settings > Page Cache.
Page Cache
If you have page caching enabled, use the Page Cache menu to fine tune it now.
Here are the settings you’ll want to have checked in the General section:
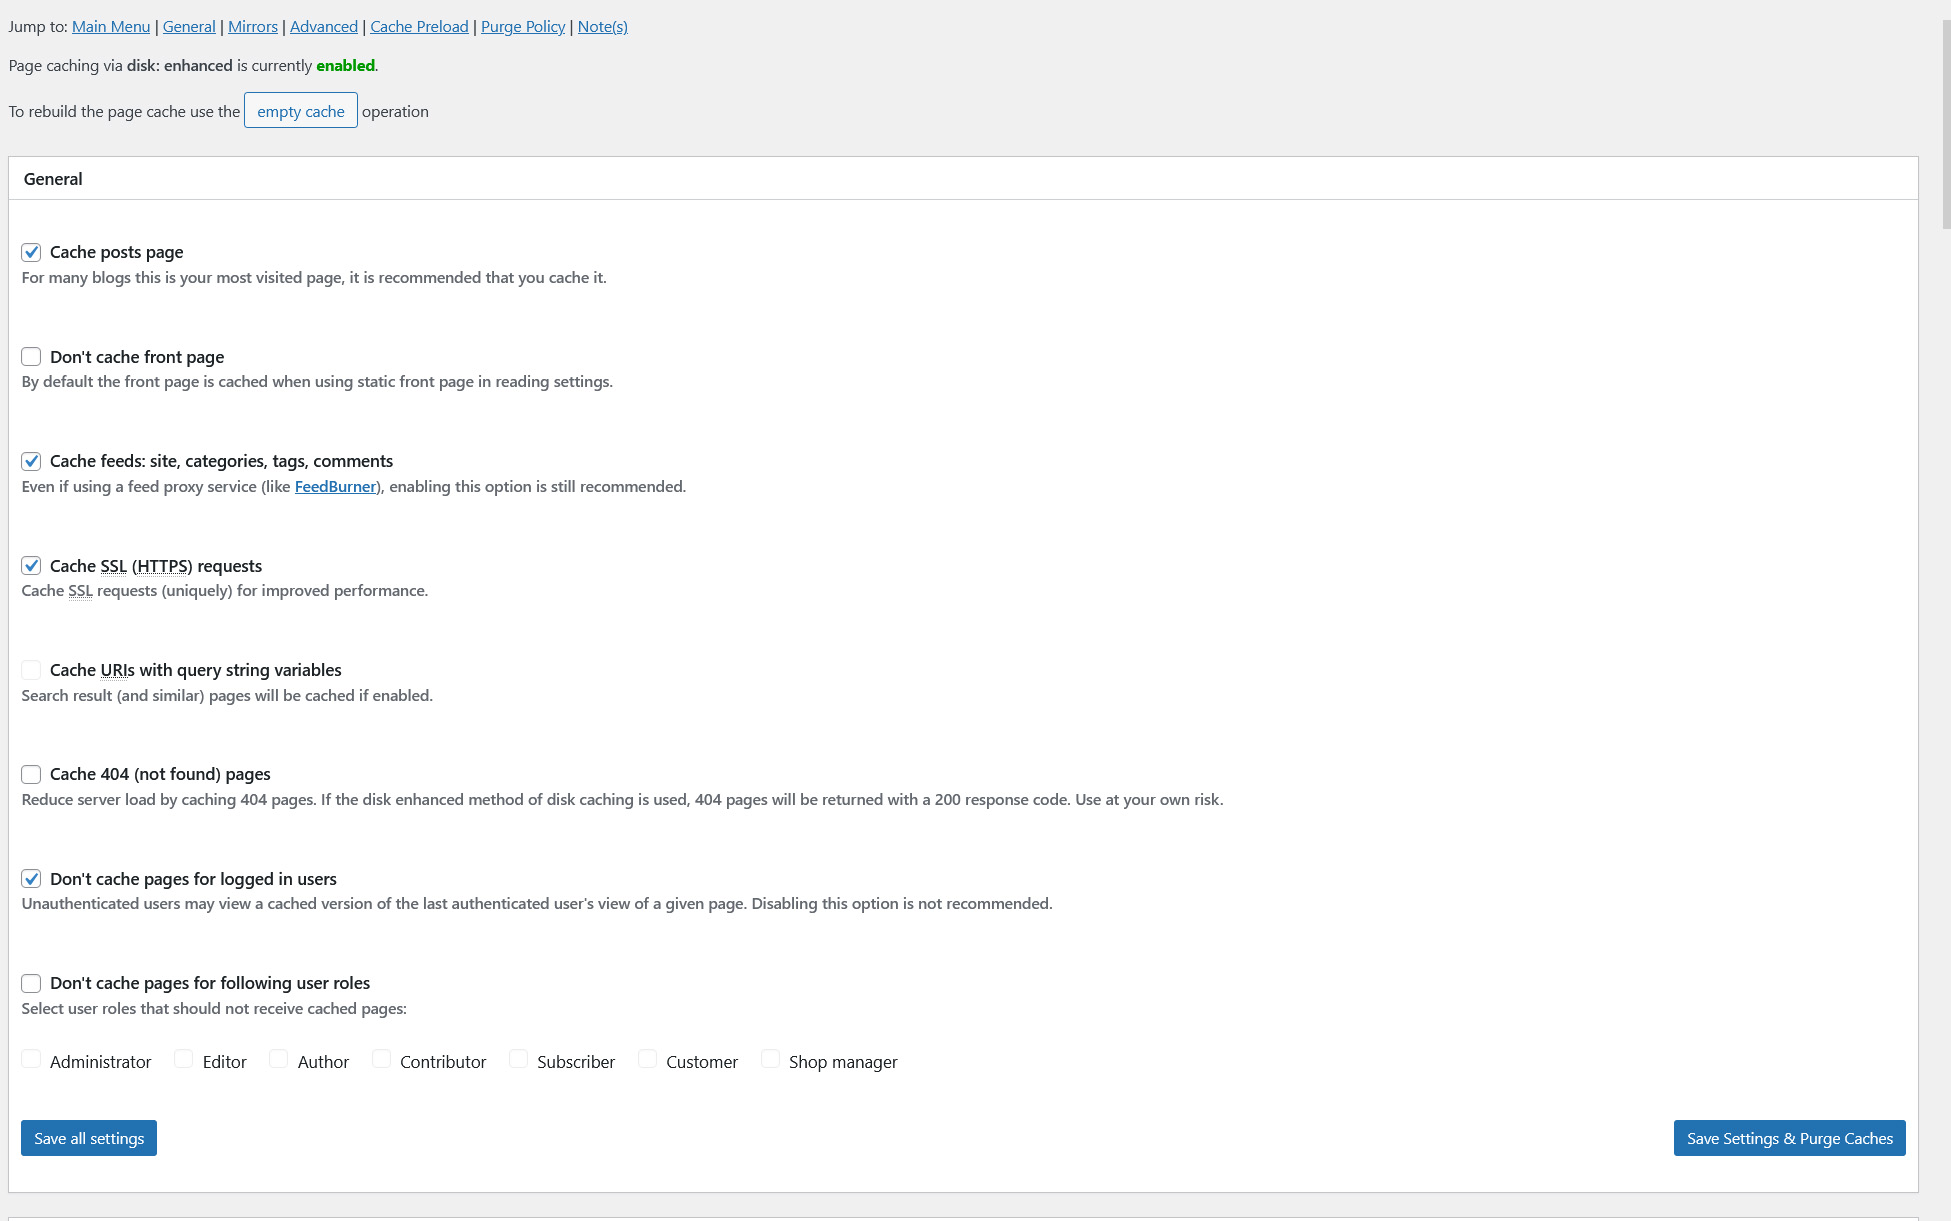
Note that it is not advised to select Cache URIs with query string variables or Cache 404 pages. This can cause unexpected results.
Next scroll down to the Cache Preload section and turn it on Automatically Prime the Cache Page:

You’ll want to leave everything else as-is in this section and move on. Since we chose to set Minify to Auto mode, and we disabled the Database Cache, you can jump to the next tab, Object Cache.
Object Cache
The Object Cache menu doesn’t have a lot of settings. You can leave the default settings as-is unless you know how to control the Default lifetime of cache objects and Garbage collection intervals.
Browser Cache
Finally, here are the advanced settings you’ll want to activate in the Browser Cache tab:
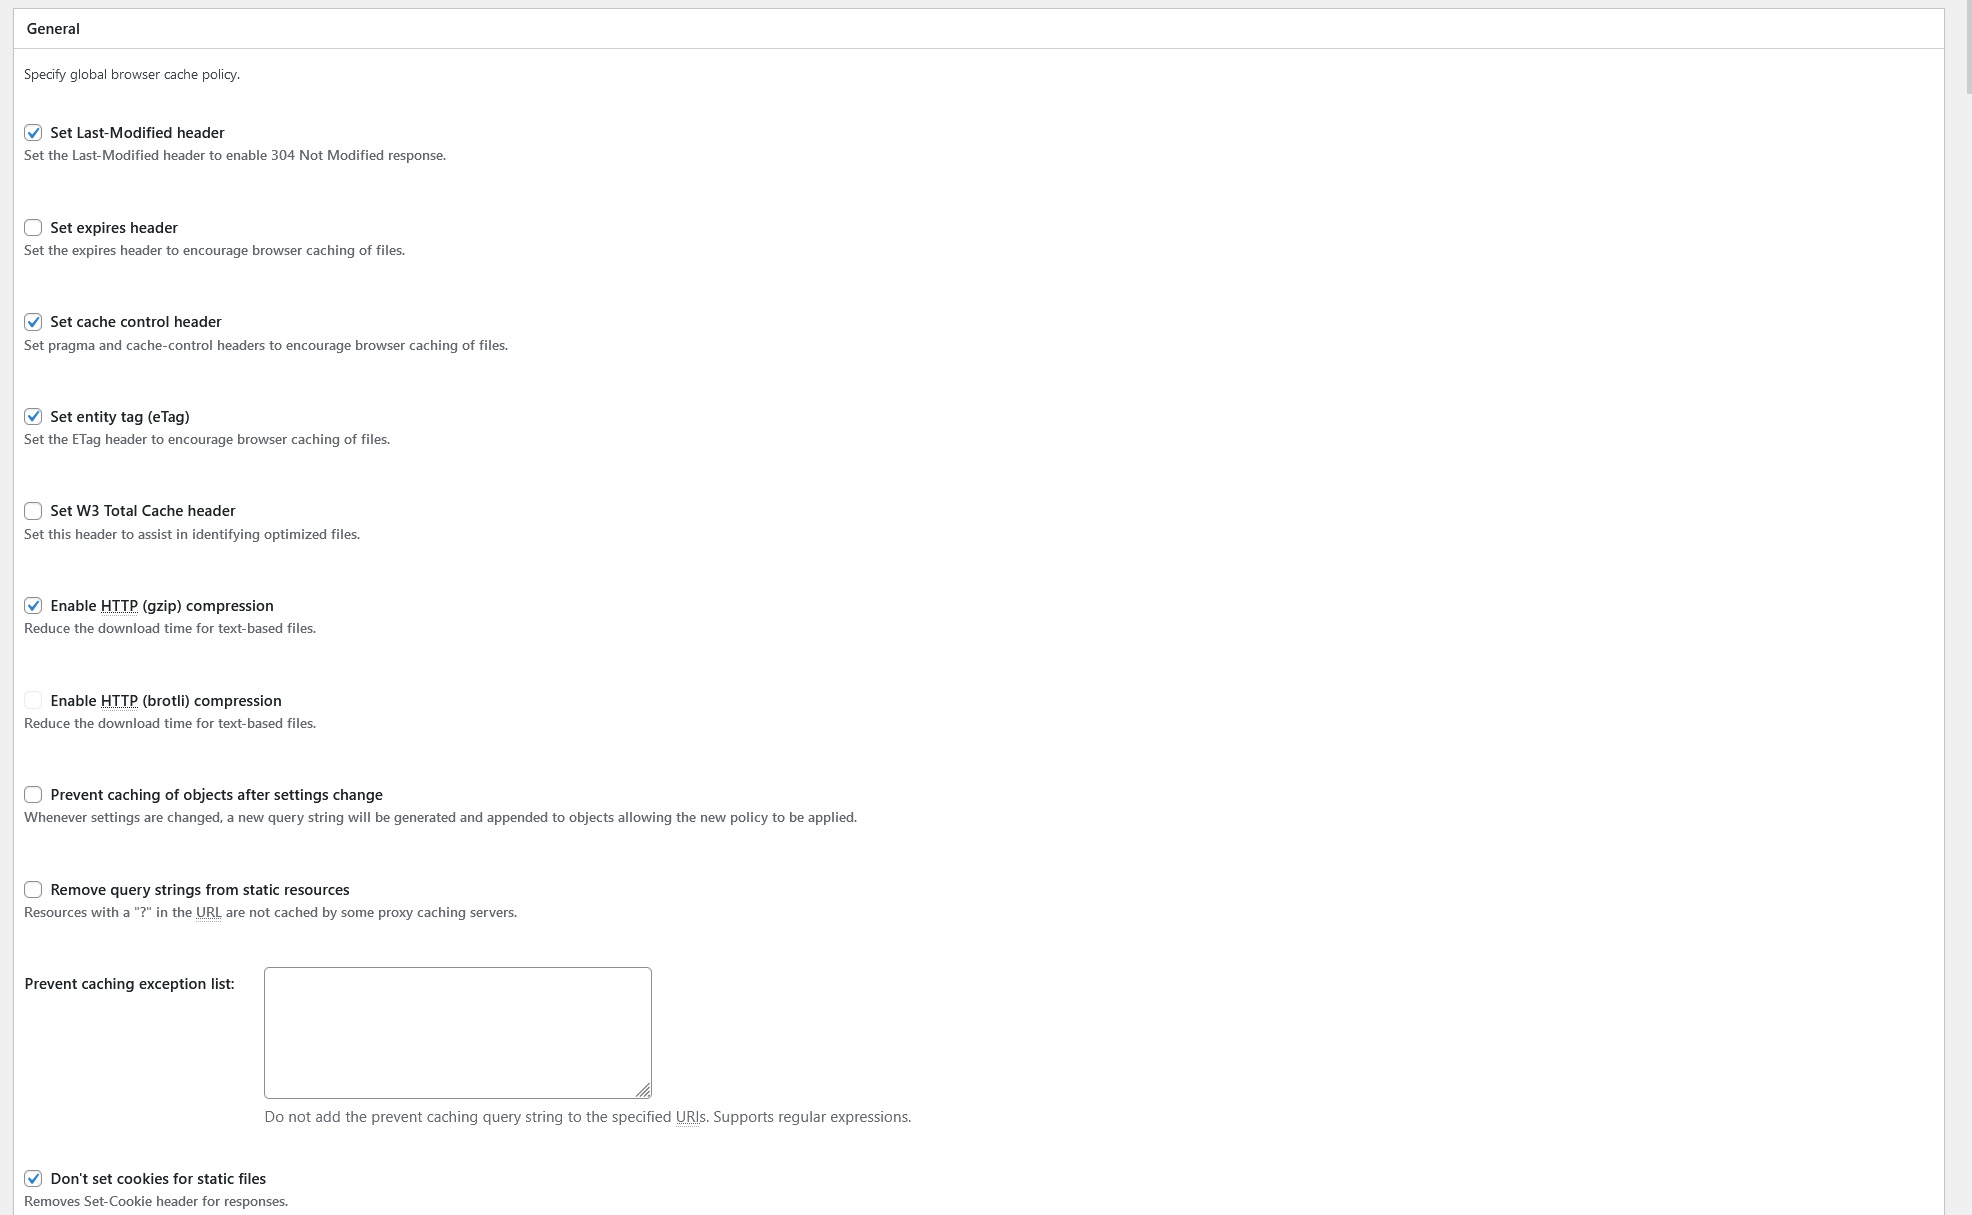

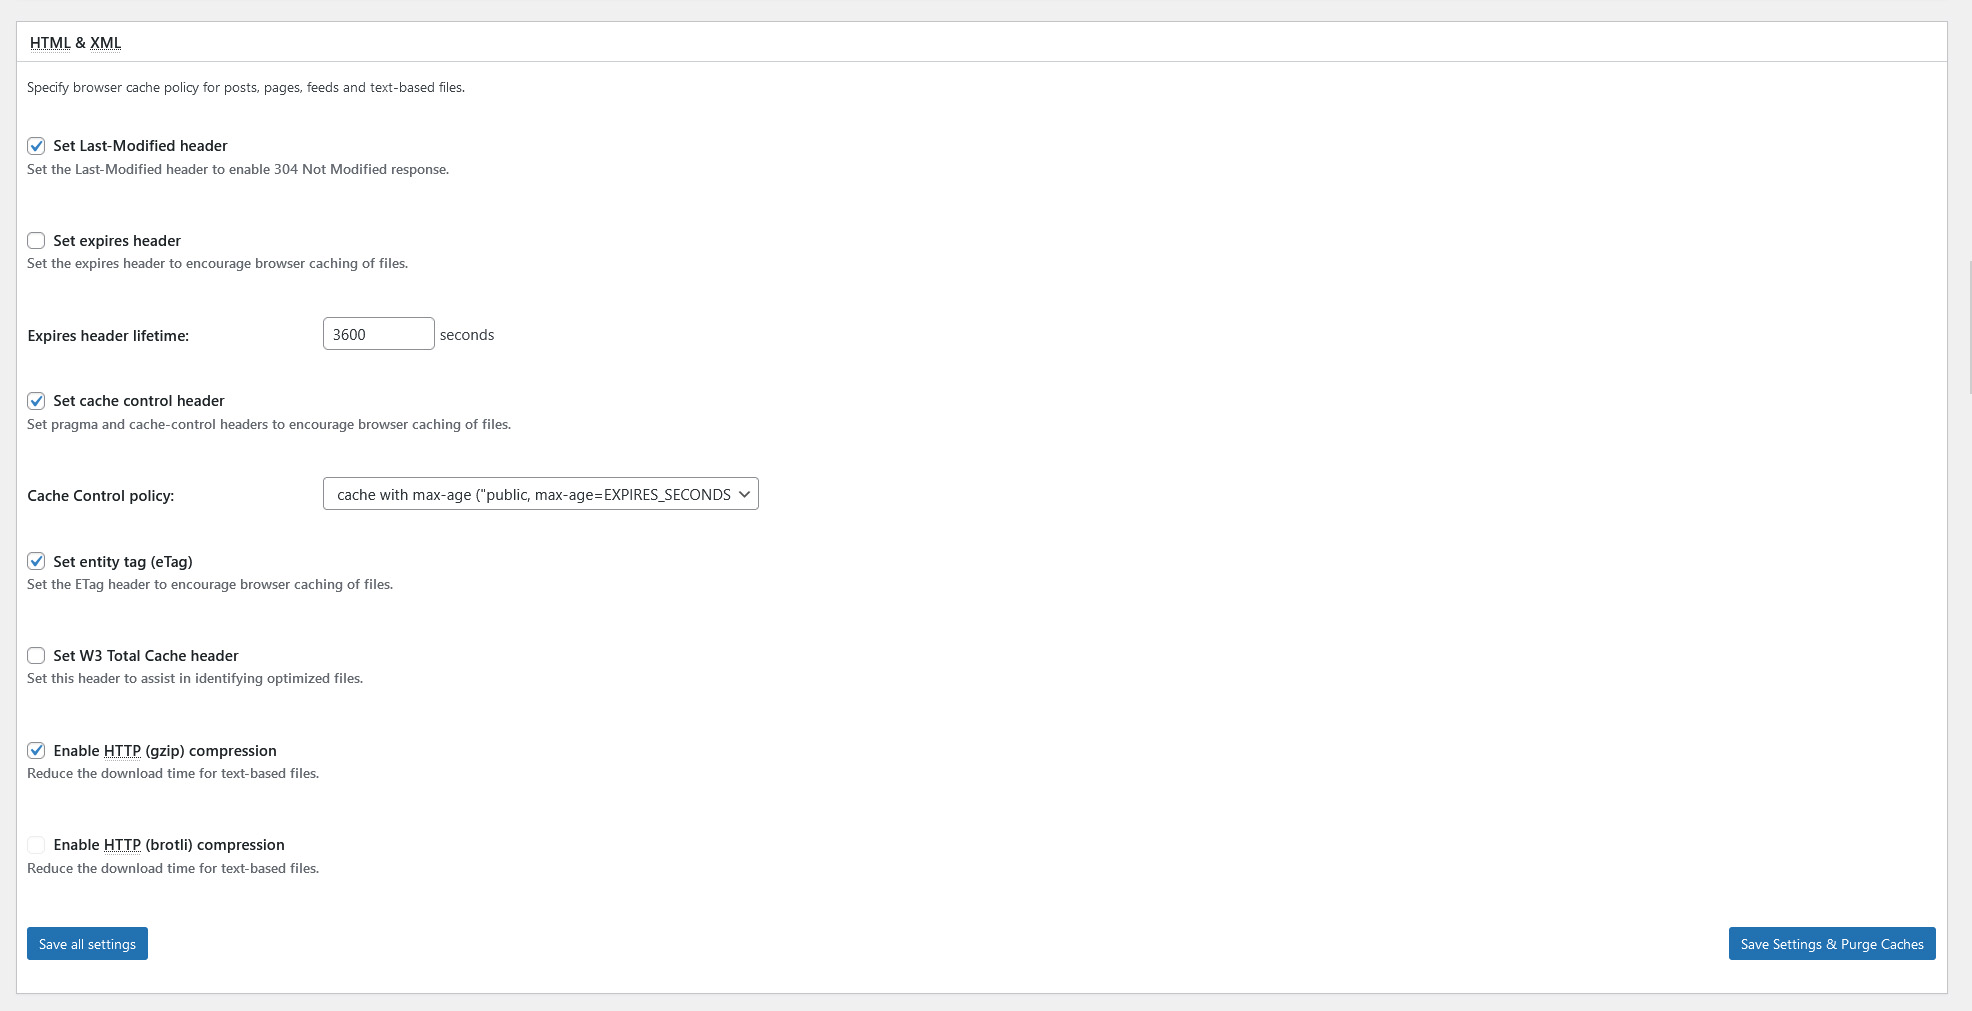

For beginners, it’s best to leave the Security Headers as-is, unless you have extensive knowledge of Cyber Security!
Conclusion
That takes care of setting up W3 Total Cache and maximizing the settings to take full advantage of what the best caching plugin for WordPress has to offer!


