
Last Updated on April 22, 2022 by WP Knowledge Hub
What Is Cloudflare and How Does It Work?
Cloudflare is a Content Delivery Network (CDN) that is comprised of a network of servers that span the globe. Cloudflare’s network of servers is one of the biggest ones on the planet, since their network spans more than hundreds of cities in 90+ countries. Connecting your WordPress website to the Cloudflare network might not only improve the performance of your website, such as loading speed, but it will also make it more secure!
How Does Cloudflare Work?
When you choose a web host, you’re committing your website to their server, which is stored in a physical location. Most major well-known hosts are located in the United-States. GoDaddy for example, is located in Arizona. That’s where its main data centres are, but they also have others are in Los Angeles, Chicago, Ashburn, Virginia, Amsterdam and Singapore. If you host your website with them, and you are located relatively near one of these data centres, you will experience faster loading times than users who are further away.
This change in loading speeds based on distance can cause problems if you have (or want to have) a global audience. However, by using Cloudflare with your WordPress website, you can easily fix this issue.
Remember how Cloudflare is a network of servers located all around the world? That’s how signing up for Cloudflare fixes the loading speed problem. By adding Cloudflare as a middle man between your users and your host, they are able to serve up a static version of your website faster by storing it on servers that are closer to users, based on their location.
For example, if you live in Northern Alberta, Canada, Cloudflare’s Calgary data centre is MUCH closer to you than GoDaddy’s closest one. This would significantly improve loading times for any Canadian users in this area.
Does Cloudflare Replace My Current Host?
No. Cloudflare does not replace your host, but rather acts as a middle man in between the host and the domain name. To setup Cloudflare on your WordPress website, you must create a Cloudflare account, point your DNS to Cloudflare, and Cloudflare then points to your domain.
But before we show you how to set it up in a step-by-step guide below, you should understand the benefits that Cloudflare brings to your WordPress website:
Cloudflare Features and Benefits for WordPress Websites
99.99% uptime
This means your website is always online, because Cloudflare has many static copies of your website saved to its memory in servers all over the world. Even if you host goes down for a few hours, Cloudflare will most likely be unaffected.
Improved Loading Speeds
Since Cloudflare servers are scattered all over the globe, it vastly improves the odds that some users will be close enough to any individual data centre that they will see improved loading speeds while visiting your website.
Firewall Security
You might already have paid for additional security services from your host or, you might have purchased a premium plugin to set one up, but this additional layer of security comes built-in to Cloudflare!
DDoS Protection
Distributed Denial of Service (DDoS) attacks are used to mess up the flow of traffic coming to your website by over-stimulating the server with false information. It floods it with redundant incoming traffic, crashing your server and your website.
Cloudflare helps mitigate this with extra protection.
Other advanced features available with Cloudflare
- Load balancing
- Enhanced performance and availability
- Gives you access to SSL (Secure Sockets Layer)/TLS (Transport Layer Security) encryption certificates
- Extra security integrations
How to Add Cloudflare to WordPress: a Step-by-Step Guide
Now to you understand what Cloudflare is and how it works, and you’ve decided to set it up on your website, follow this step-by-step guide on how to add Cloudflare to WordPress:
Step 1) Create Your Cloudflare Account
Create a new Cloudflare account by visiting their website and clicking sign-up. It’s fast and easy and free!
Step 2) Add Your WordPress Website to Cloudflare
After creating your account, you’ll want to add your site by clicking the ‘+ Add a Site’ button, and enter your domain name:

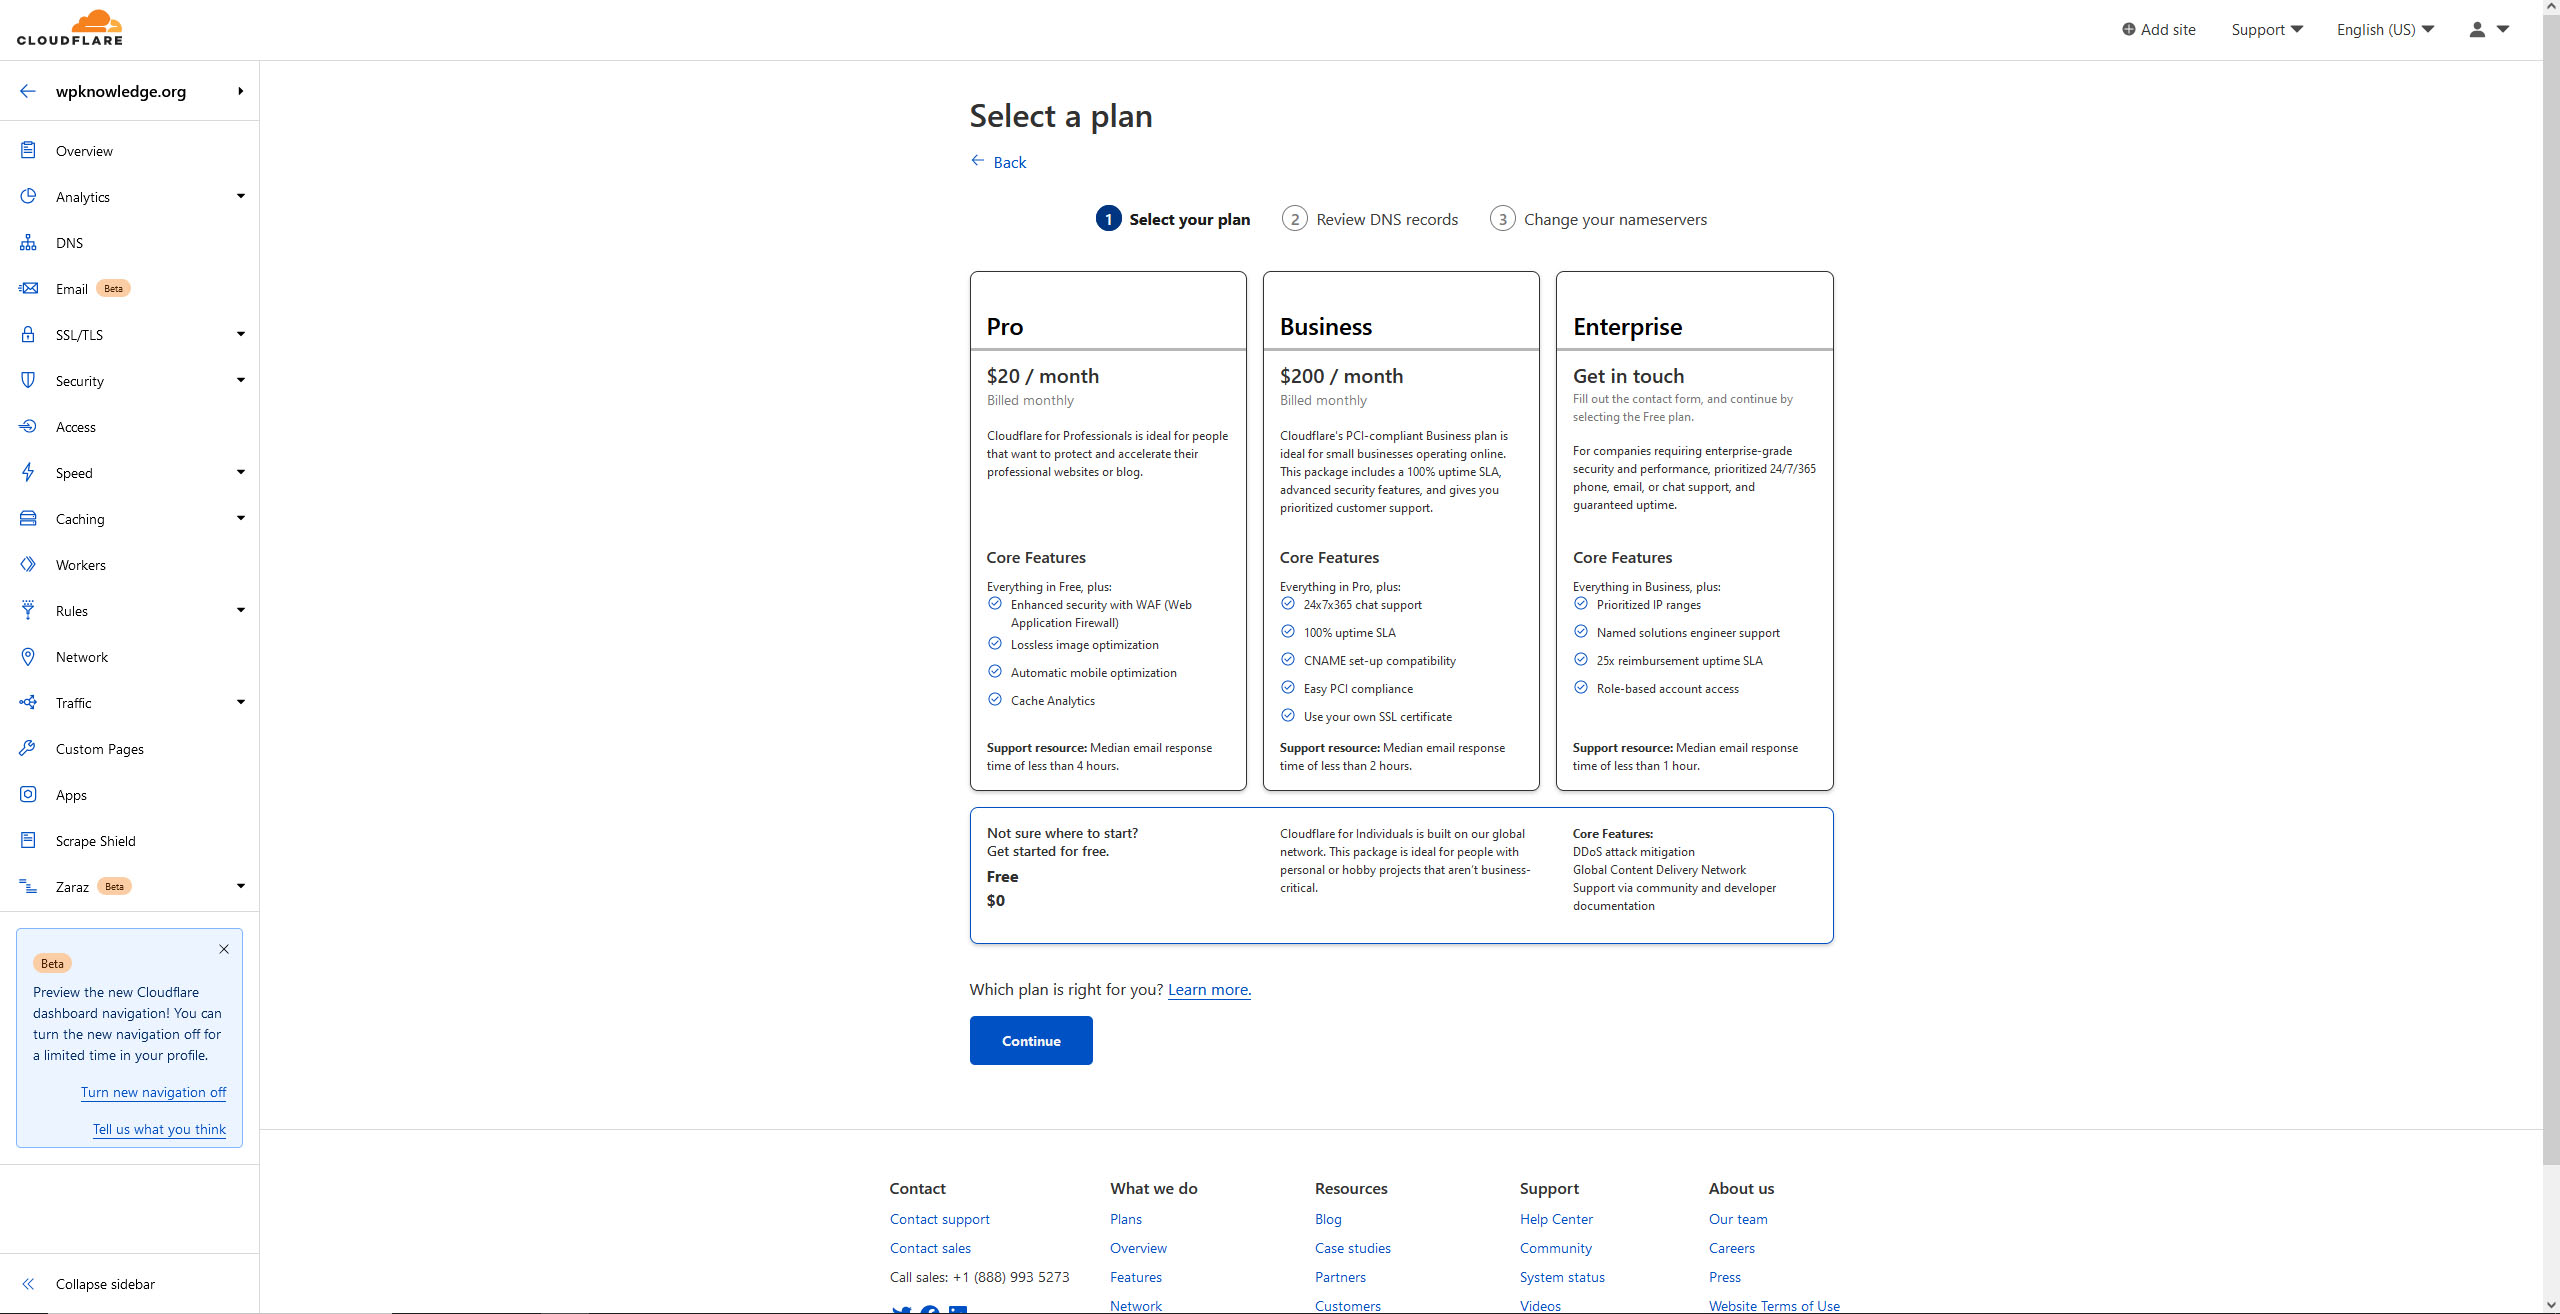
Step 3) Select your Plan
Next, select the plan that’s right for you. Remember, they have a free plan (the box underneath) which has all the features and benefits we discussed above, but read through each and decide which one works for you before selecting it:
Step 4) Review your DNS Records
In this step, you’ll be asked to review the DNS records. These are the records that identify which server your website and its components are hosted on. Each server has a unique IP, which are represented as A records. If this all looks good to you, proceed to the next step.
Step 5) Configure Your Nameserver
This is perhaps the trickiest part of the process, since you’ll need to manually change your DNS information in your registrar account. The registrar is the place where you bought your domain. If you purchased the domain name from GoDaddy, then log in to your GoDaddy account, find your domain, and select Manage DNS. You will need to change your existing nameservers to the new ones. Cloudflare makes it easy by providing clear instructions on what to do:
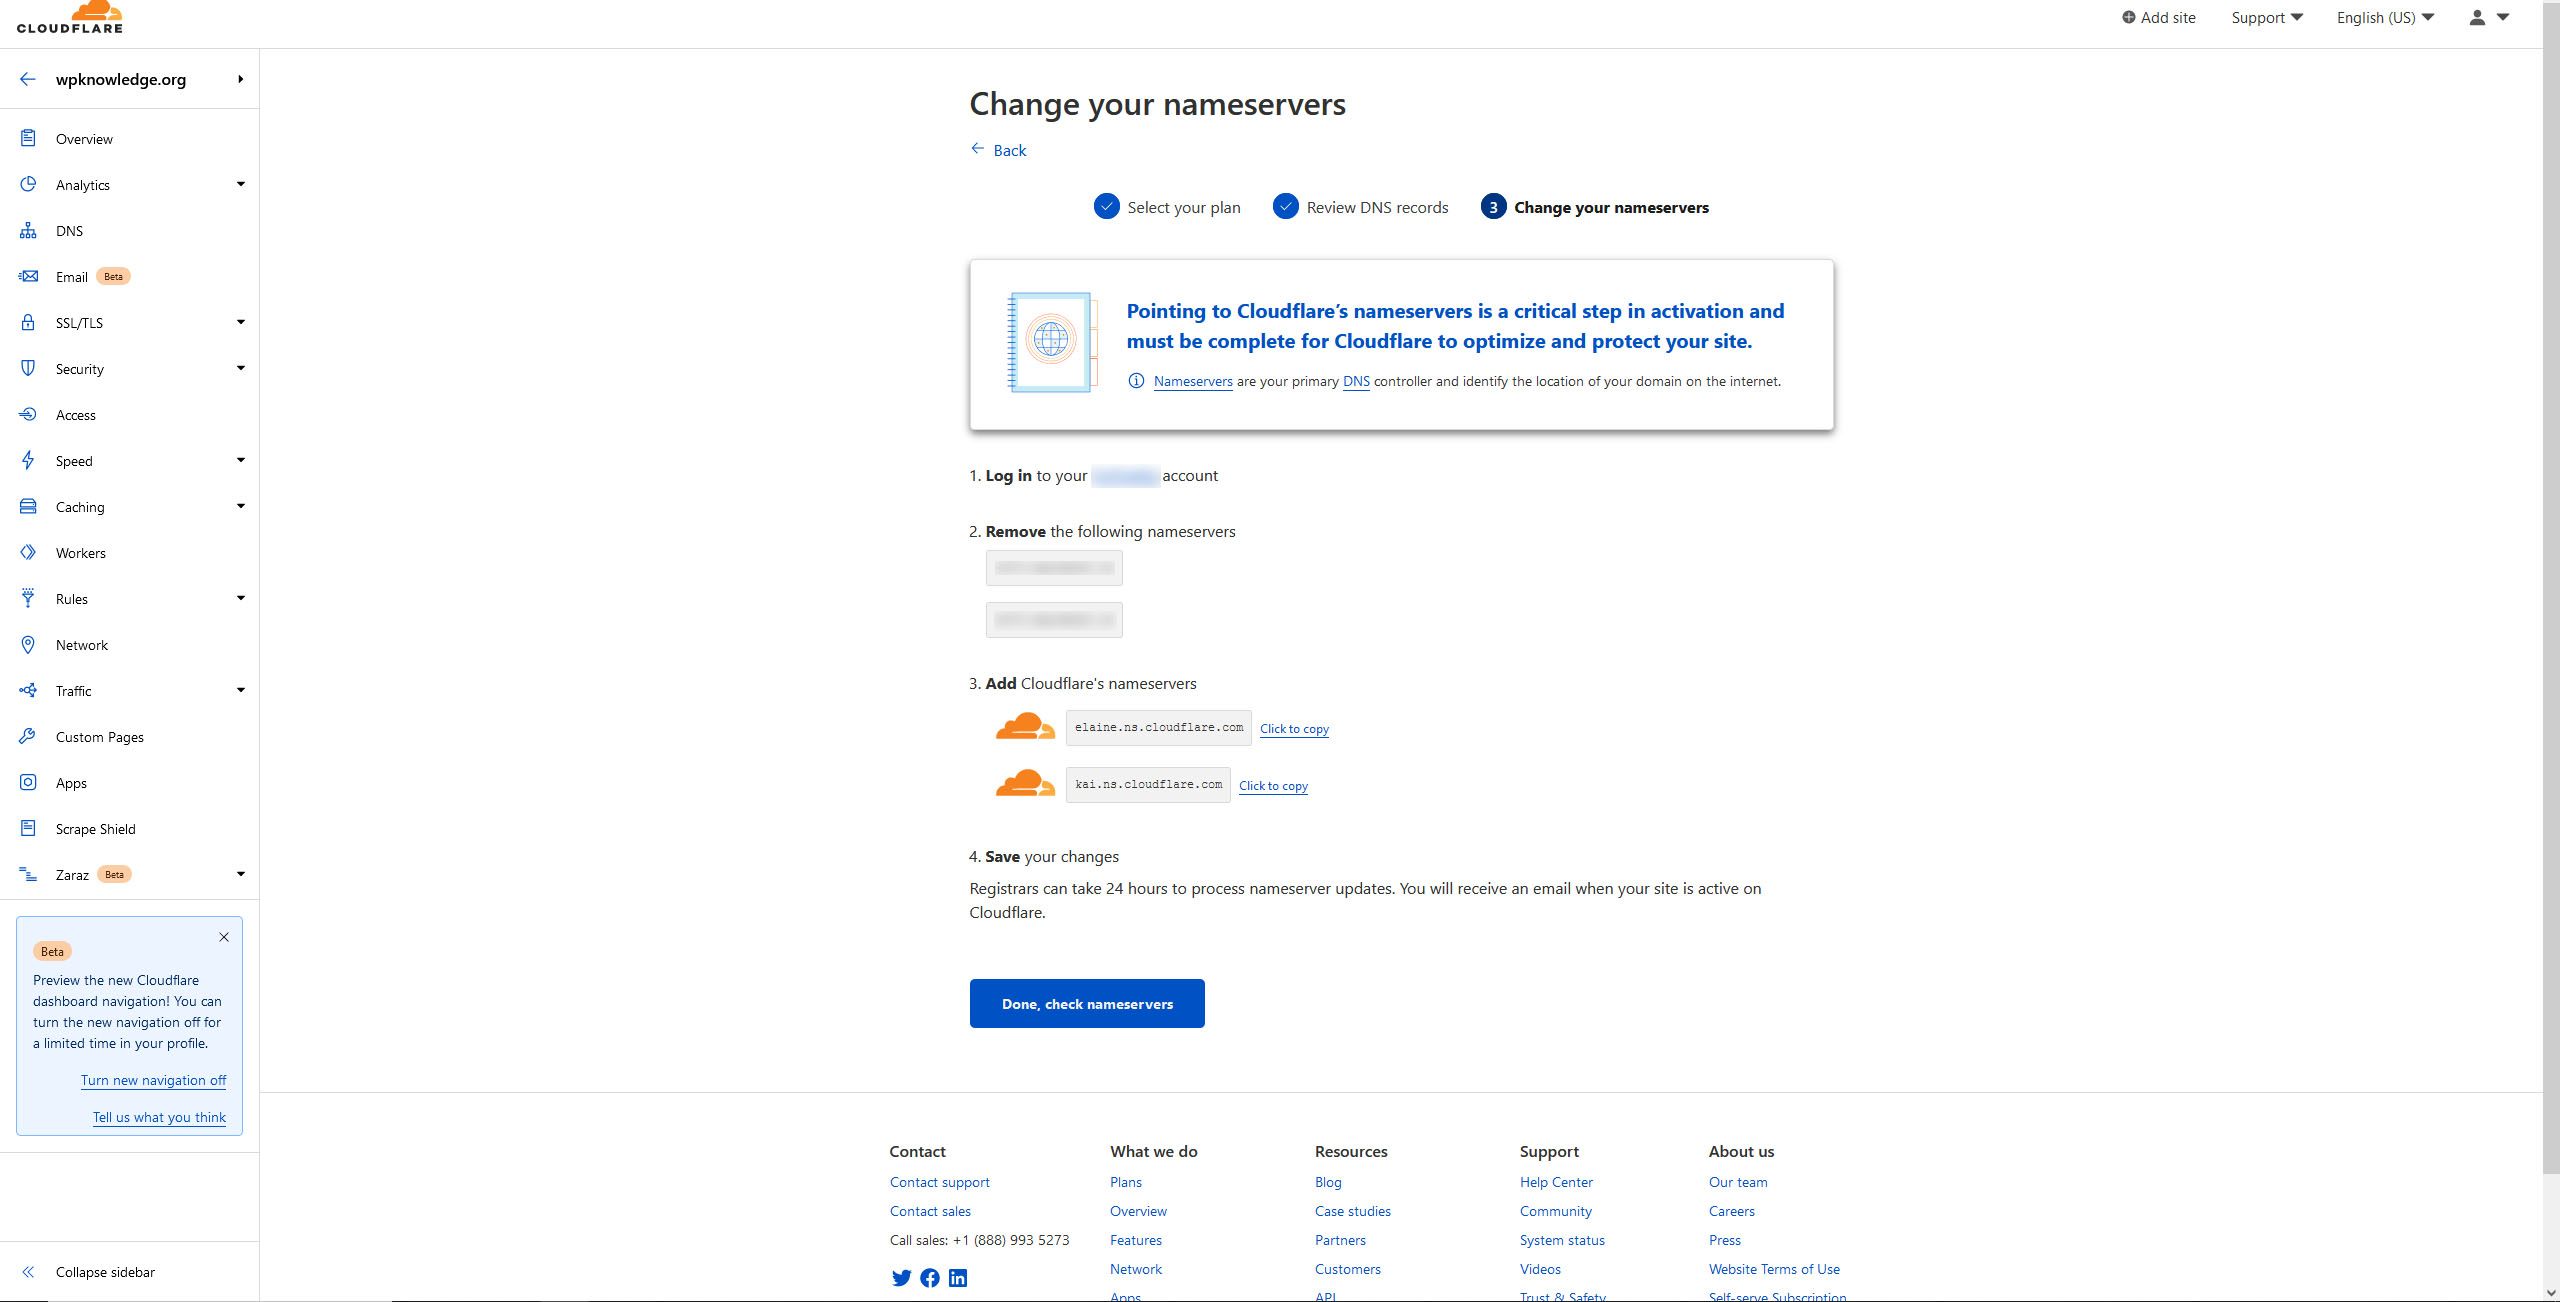
Once you’ve changed your current nameservers to the ones Cloudflare provided, head back over to Cloudflare and click on Done.
In most cases, you should see a message like “… Cloudflare is now protecting your site” within one hour.
Once you get that confirmation email from Cloudflare, you can head back to WordPress.
Step 6) Install the Cloudflare WordPress Plugin
Finally, you’ll want to get the Cloudflare for WordPress plugin, which is simply called Cloudflare.
Go to Plugins > Add New > and search for the word Cloudflare. You’ll see in the top results right away, with the Cloudflare logo. Make sure you get the official one, and not copy-cats trying to lure you with the same name.
Install it and activate it, and you’ll be asked to create and account or log in. Since we already have an account, click on log in, and enter your email address.
You will also be asked for an API token. An API token is a technical term for a snippet of code, like a private key, that connects one software to another.
In this case, Cloudflare needs to connect your account to your website. In order to get your API token, navigate back to your account page, and under the Overview tab, click on Generate your API token, in the bottom of the right sidebar:

Just choose “WordPress” from the list that appears, and keep the default options as is. Simply follow the instructions until you are shown your key which is a series of letters and numbers, like a long password.
Copy and paste it into your WordPress website Cloudflare plugin settings and that’s it! We’re connected!
The last and final thing you’ll want to do before wrapping things up is to enable the “Apply Recommended Cloudflare Settings for WordPress” setting by clicking Apply.
Congratulations on setting up Cloudflare and improving your website’s speed and performance!


